Archive for the ‘Articles’ Category

Jun 2 3 How to fix continually reconnecting Bluetooth devices in macOS

Lately I've been having a problem with an Audio Bluetooth device (specifically, a Jabra Speak 510) that would keep reconnecting indefinitely to my MacBook Pro, a 16" model running macOS 11.1 Big Sur.

This Bluetooth device is slightly out of range, causing the system to drop the connection. Weirdly enough, it affected other devices connected, like an Apple Trackpad and Keyboard, causing them to behave erratically. When this device was re-connecting, keypresses wouldn't register on the keyboard and the cursor wouldn't move smoothly.

One would think this would be an easy fix: Disconnect the device in the Bluetooth preference pane in System Preferences.

However, clicking the little X when hovering over the device wouldn't do anything. The device would keep reconnecting.

Another way had to be found to forcefully remove the device.

Attempt 1: Remove All Devices

First, you can of course Shift-Option-click the Bluetooth icon in the Menu bar in order to "Remove all devices", or "Reset the Bluetooth module".

I tried both to no avail. (Interestingly enough, I had to re-pair my Apple keyboard and trackpad, but the device in question just connected without me having to do anything)

Attempt 2: Removing Bluetooth configuration files

Then I tried removing the Bluetooth preference files from the Mac's filesystem. First, disable Bluetooth, and then execute the following commands in Terminal.app:

sudo rm /Library/Preferences/com.apple.Bluetooth.plist

sudo rm ~/Library/Preferences/ByHost/com.apple.Bluetooth.*.plist

After running the commands, reboot your Mac and reenable Bluetooth.

These commands should delete both the global system's Bluetooth preferences and your users' bluetooth preferences.

However, the device kept reconnecting!

Attempt 3: Bluetooth Explorer to the rescue

I was pointed in the direction of the Mac developer utility Bluetooth Explorer, which can be freely downloaded off Apple's developer portal. Strangely enough, Apple seems to have discontinued this utility for the latest versions of XCode, but it seems the version from Xcode 11.4 still works.

This utility contains a lot of functions, but the one function I found that would help was disabling Simple Pairing, hidden under Debug Settings in the "Get Local Device Info" dialog (opened by Cmd-L.)

Changing the first dropdown from Enabled to Disabled solved the issue by allowing me to prevent the device from pairing

After disabling Simple Pairing, macOS suddenly started to prompt me for whether I wanted to connect to the device.

I could then check off the Ignore this device checkbox, and click Cancel to avoid pairing with the device.

A similar dialog to this would allow me to prevent the device from pairing

Since then, the problem seems to have been resolved.

It is amazing to me that I needed to do this to resolve the issue. In my opinion, it's simply yet another story of how Apple's software quality is steadily declining.

Jan 10 1 Ubuntu 18.04 Networking Explained

If you've been used to managing Ubuntu 14.04 LTS and Ubuntu 16.04 LTS servers, Ubuntu 18.04 will be really confusing, because everything about networking just changed.

Let's say you want to make some changes to an interface, like DNS/nameservers or adding an interface. With previous versions, you'd just go to /etc/network/interfaces and make the change, and run service networking restart. Not so easy now.

If we take the DNS change as an example, you might grep /etc for the DNS server address, and then you'll end up with two filenames:

  • /etc/cloud/cloud.cfg.d/50-curtin-networking.cfg
  • /etc/netplan/50-cloud-init.yaml

It's not obvious, to put it mildly, where to make the change. The two files seem identical, so which one is the authoritative? In addition, the 50-cloud-init.yaml file says the following at the top:

Changes to it will not persist across an instance.

Oh, that must mean that the correct file is the one in /etc/cloud, right? Wrong!

The way it works is that when you set up the machine, "cloud" is in charge of writing the /etc/netplan/50-cloud-init.yaml on the first boot. That's why  it says it "will not persist": it will for your server, but it's a hint to image builders that when they're building a custom ISO that it's not the place to put such things.

Conclusion

The right place to make the change is /etc/netplan/50-cloud-init.yaml.

Then, to apply the change, you now have to use netplan apply.

Nov 24 0 Takeaways from Kubecon North America 2019

Photo of large crowd at KubeCon 2019

by CNCF Flicker, licensed under by-nc 2.0

Field Report from San Diego

Let me start by giving some praise to the event organizers of Kubecon. With attendee counts more than doubling every year, with more than 12,000 attendees at Kubecon+CloudNativeCon in San Diego, California – just last year in Copenhagen, it was around 4000 – it was amazing how well it's ran. And even succumbing to rain – one of the few days a year it does in San Diego – the conference happened without any significant hitches (the rain caused a power outage at the convention center, and some breakout sessions had to be moved.)

It's also very exciting to see that most large companies in the Fortune 500 are using Kubernetes in some way, probably for production systems. One of the key moments of the conference was China Mobile who, with Faraday cage and all, set up a video chat live demo of a complete 5G end-to-end cell phone stack and performed a call across the ocean with another endpoint in Europe. The connection seemingly wasn't great, but all control software ran on Kubernetes.

E2E 5G network demonstration using Kubernetes

Heather Kirksey and the fully containerized 5G network demonstrated by China Mobile – by CNCF Flicker, licensed under by-nc 2.0

The same with Walmart, who is now running a Kubernetes cluster in each of their stores, with two-way sync using Kafka and complete replication to multiple data centers (if something goes wrong.) That's an impressive Grafana dashboard.

Kubernetes is the App Store of the Enterprise

It's not hard to understand that the CNCF – and the hundreds sponsors – are pushing Kubernetes as the Enterprise application platform. The software application deployment needs of modern software stacks have evolved so quickly and are now so complex, that tools like Kubernetes are the only stacks that fulfill these demands while providing a huge ecosystem (and therefore developer adoption.)

These increasing business needs has resulted in a huge ecosystem, with everything that you could possibly want from your cluster available in a Kubernetes-compatible solution.

Statefulness on Kubernetes is Still Not Trivial

But that's not to say you can't do it. Slack, the chat app everyone seemed to be furiously typing away on at KubeCon, has engineered a truly impressive database system using Vitess/MySQL. It's not running on Kubernetes, but they are evaluating it. The stats speak for themselves: 53 billion queries per day, 7500 TB of storage. (Slides)

If you're a smaller shop, it's not impossible, but you might see your cluster becoming more like pets, and less like cattle. For those of you looking into that, Operators is the new thing. They will take care of running database servers for you, without the manual setup. There are operators available for most open-source database systems these days.

Security is Still Lacking

It seems like every few weeks we read of a company having exposed a large amount of data from an open-to-the-internet Elasticsearch cluster. That's caused by how easy it is to install it and make it accessible over the network. It didn't even use to come with any user management or authorization solutions. Kubernetes is the same way, it's just more complicated. And CNCF wants to avoid having enterprises make the same mistake.

A security audit was performed by Trail of Bits, with a big focus being on the trust zones (there are many) and ergonomics of Kubernetes – how do you manage it daily? – and found 37 issues during the source review. Slides here.

Users are confused on how to secure their Kubernetes cluster. Doing it right requires third-party functionality which makes it yet another hump to jump over. Security also greatly depends on how you run it: GKE? AWS? Kops on AWS? On-prem? Each security solution is different.

Per default, there is no way to give other users control of your cluster, secrets are not encrypted and every service you're running can talk to everything else (including Kubernetes services.) Something to be aware of if you're not running Kubernetes with a large security team behind you.

Kubernetes is Simple to Set Up, but Easy to Take Down

Employees at Airbnb gave a great talk detailing some of the was complexity was creating problems in their Kubernetes clusters. With 700 services and 1000s of nodes running the platform, they are some of the largest users of Kubernetes, and have experienced their share of issues ranging from sudden out-of-memory errors to service reliability during releases. The video of their talk is up, and you should watch it!

Being a system that thousands of organization all use to run their business means complexity. This was demonstrated by Leigh Capili of Weaveworks (great intro by the way). Building such a system requires a certain feature set, which businesses depend on. What has surprised many Kubernetes user is how easy it is to screw up those features in your deployment in such a way that, say, every time you release, your users will experience 503 errors and timeouts. And you have to do some really unexpected things to circumvent this. Most companies only notice this when they have really good monitoring (which, again, is not trivial to implement), or when they start to release many times a day.

Kubernetes is Simple to Set Up, but Hard to Upgrade

The Kubernetes story for upgrading is brutal (I'd like to have asked the Walmart guys that; see above), and something that was evidenced in a talk by Puneet Pruthi from Lyft (titled Handling Risky Business) that detailed their own tool that carried out upgrades by purging pods until it was empty so a new one could be started. They also talked about typical scenarios that may be catastrophic: etcd loses quorum (I can hear you wince), apiserver overload, cloud provider capacity/rate limits, and more.

For smaller shops, I would recommend creating a completely new cluster, moving the traffic, and deleting the old cluster. It makes sure that a) you keep your configuration in e.g. Git (you never directly manipulate your cluster with kubectl, right? ... right?), b) your monitoring works well and c) that you're ready for disaster recovery.

Another tool, Velero, was also the subject of a talk, and provides an easy CLI utility for backing up all your Kubernetes entities – and their storage backends – to a service like Amazon S3.

The Kubernetes Development Story is Still Under Development

The number 1 reason for migrating to Kubernetes is because it's hard to manage all those (micro)services, and if you think it's hard to run them on millions of dollars of enterprise server-grade hardware, it's harder to run it all on an overheating Apple MacBook Pro.

At the conference, I've seen multiple MacBook Pro owners look up in bewilderment as their workstations were lifting themselves up and flew out the windows due to the fans spinning so much. Okay, that last part was not completely true, but it's no surprise that dev environments were mentioned in the keynote. It's about the only complaint developers have about Kubernetes at my job.

But it's looking less bad now that some serious effort has been invested into the issue. We're seeing several potential solutions, including new minimal Kubernetes stacks like Microk8s and K3s as well as development tools like Telepresence, Skaffold, Tilt, Garden, and Azure Draft. But I'm still waiting for a definite solution on this.

A big feature for developer friendliness was announced at the Keynote: debugging using sidecar containers. This allows you to debug production images that don't have the typical debug tools included, so you don't have to manually install these in your running pod. Nice feature (and potentially nice for attackers, too, so keep that in mind!)

On another note, take a look at this huge list of kubectl productivity hacks from Daniel Weibel at Learnk8s.io.

Full list of videos

Lastly, it seems like all the talks are already available right now on YouTube, so go watch them all here.


What are your opinions and experiences of Kubernetes as of late? Let me know in the comments.

Aug 23 26 Toggling BIOS mode on Corsair keyboards

Some Corsair keyboards won't work in your computer's BIOS due to gaming optimizations -- any keys you press before booting an OS will not be recognized.

In order to use your keyboard in the BIOS, you must turn on "BIOS mode" for your keyboard. This mode apparently also is required to use the keyboard on Xbox or Playstation gaming consoles, and it is very hard to find documentation for this on the Corsair Web site, so here's a guide.

How to find the WINLOCK key on the Corsair K63

How to find the WINLOCK key on the Corsair K63

BIOS Toggle Procedure

For keyboards without a BIOS mode switch, the procedure is as follows:

  1. Hold down the WINLOCK key (Can't find it? See image above)
  2. Wait 5 seconds
  3. Now hold down the F1 key (so both keys are pressed)
  4. Wait 5 seconds
  5. Release WINLOCK - the Scroll Lock LED should blink
  6. After a second, release F1

The LED will continue to blink as the keyboard is in BIOS mode. To turn it off (and improve its gaming performance), do the steps again.

Keyboard Reset

If the steps above don't work, try doing a reset of the keyboard first:

  1. Unplug the keyboard
  2. Hold down the ESC key
  3. Plug the keyboard back into the computer (while holding down ESC)
  4. Wait 5 seconds
  5. Release the ESC key
  6. The keyboard blinking indicates a successful reset.

Jun 4 2 Why is the Mac Pro so expensive?

On June 3, 2019, Apple launched its long awaited successor to the "trashcan" Mac Pro introduced back in 2013. In what some has dubbed "its attempt to build the most powerful Mac ever", Apple went all out to create the ultimate workstation for scientists, 3D modelers, creative professionals, movie editors, composers, and many more.

The new Mac Pro: $6K! I'm going to need a mortgage on this damn thing.

Yet, many were shocked by the price point: $5,999 – without a monitor. To the average computer enthusiast, this just feels insanely expensive. What's that money actually going to? Here, I've attempted to recreate a part-for-part base model Mac Pro replacement with PcPartsPicker and a prebuilt enterprise-grade workstations from HPE.

Build-Your-Own from PcPartsPicker

CPU: Intel Xeon E5-1660 3 GHz, 8-Core

Here's about a third of the cost: the processor. Not much to say about this one, it's a highly clocked server-grade processor with lots of cache. Price: $1704

Extra CPU cooler: Noctua DH-D15, price: $90

Motherboard: Asus - Z10PE-D16

The Mac Pro theoretically supports up to 2 terabytes of memory. That's hard to get, so we had to settle for this Asus workstation motherboard that, while only supports a single terabyte of RAM, has two processor sockets (which the Mac Pro doesn't.) It also has 4 16x PCIe slots, (not 3, like the Pro), but only 2 8x slots (the Pro has 3, the last is a 4x card used by an Apple I/O card.) Price: $504

Memory: Kingston 4x8 GB

While the higher-core count CPU models support 2933 MHz RAM, the 8 core version used here only supports 2666MHz. This is the same configuration as the base Mac Pro, and it's obviously ECC. Price: $292

Storage: Samsung 970 Evo 2TB SSD

While the Mac Pro comes with a measly 256 gigabytes of memory – possibly due to some workloads using networked storage, making larger internal storage redundant – storage is relatively cheap, so I've sprung for slower – but almost 10x the capacity – Samsung 970 Evo M.2 storage. Price: $549

Video card: Asus Radeon RX 580 ROG STRIX TOP

While the clock speed of the Mac Pro's card isn't listed, I'm going to guess it's not slow. This is the fastest version of the 580 for PC, a card which traces its roots to the Radeon RX 480, released way back in 2016. Price: $410

Case: Phanteks Enthoo Primo

While I don't think this matches the looks of the Mac Pro, there's no case that can live up to that standard. This one seems fine, and has plenty of capacity. Price: $259

Power supply: EVGA SuperNOVA T2

Beating the Mac Pro's power supply by 200 W, this 1600 W behemoth is one of the best power supplies money can buy – but I'd venture that the one in the Pro is quieter. Price: $428

Accessories:

  • Intel 2x 10 Gbit/s: $316
  • Asus PCE-AC58 Wi-Fi: $86
  • 3x Noctua NF-P14 case fans: $60
  • Logitech CRAFT keyboard: $170
  • Logitech G903 mouse: $100

Total price (Jun 4, 2019): $4965
Apple Difference: + $1034

(Here's a link to the complete PcPartsPicker list: https://pcpartpicker.com/list/HsVCNQ.)

While there is a difference, it's important to note that even this won't beat Apple's offering (except for the storage capacity) – this, for example, only supports half the amount of memory, you have to factor in how much your time building this is worth as well as Apple's industrial design: noise levels, ease of use and the all-metal cabinet with gorgeous stainless steel handles. And you can forget about macOS.

HP Z8 G8 Workstation

Here's the configuration I ended up with:

  • CPU: Xeon Gold 6144, 8 cores, 3.5 GHz
  • Memory: 32GB (4x 8GB) of 2666MHz DDR4 ECC
  • Storage: 256GB NVMe M.2 Solid-State Drive
  • Graphics: NVIDIA Quadro P4000 8GB
  • Network: HP Z Dual-Port 10GbE Module
  • Wireless: Intel 8260 802.11 a/b/g/n/ac & Bluetooth 4.2 PCIe Card
  • HP keyboard & mouse

Total price (4 Jun, 2019): $7625
Apple Difference: - $1626

This Z8 has a Slim DVD Writer and the faster NVIDIA Quadro P4000 graphics card, as well as an extra USB-C and Thunderbolt, which is an add-on on the HP Z8 (so don't spend the money if you don't need it.)

This machine has, in many ways, better specs than the BYO version above; for example, the motherboard supports an enormous 3 terabytes of memory, and is a very close competitor to the Mac Pro if the operating system isn't part of the equation.

So What?

There's no way to make such a comparison fair, in my opinion, Apple has out-innovated everyone in the business in building the ultimate professional workstation that has no bounds on performance (or industrial design). However, something the Mac Pro doesn't have (yet) is dual CPUs, so competitors have double the theoretical processor performance. In addition, Apple has it's own MDX expansion design, which allows for better performance in a single package.

I hope this goes to show that if you think that the Mac Pro is too expensive, you're just not the target market – those that need this thing won't bat an eye at the cost, especially since I'm guessing many will configure it to 10 times its base price.

I'm looking forward to maxing out the Mac Pro configurator to see how bad it gets. As a software developer, I have no need for this machine: an iMac Pro – or even a regular 5K iMac – would serve my needs plenty for many years to come.

But for the ones which the fastest computers are chronically slow, this is it.

May 6 2 Optimizing a web app for a 400x traffic increase

Running my service/hobby project Webhook.site (GitHub page) has presented me with quite a few challenges regarding optimising the VPS (virtual private server) the site is running on, squeezing as much performance as possible out of it.

Originally, when it launched, Webhook.site was using a completely different datastore and Web server software than it is now.

In this post I'll try to chronicle some of the challenges of keeping up with increasing traffic going from 20 to almost 8000 weekly users – a 400x increase!

March 2016

The first line of code was committed to Git on 21st March 2016, during which I committed the basic Laravel framework files, database migrations, models, etc.

SQLite was chosen as the datastore since it was easy to get started with (I planned on migrating to either MariaDB or Postgres later on, but – spoiler alert – that never happened.)

For the Websocket/push functionality, I chose Pusher, a SaaS that specialises in hosting this kind of service. The free plan was more than enough!

For hosting, I placed it on my personal server, a 1 GB DigitalOcean VPS which hosts a bunch of other stuff.

November 2016 – Pusher running out of connections

I posted the site on Hacker News, and the site got it its first surge (around 4000 unique users) in traffic, which it handled acceptably (considering almost all visitors just loaded the front page and closed it after a couple seconds.) I got a good amount of feedback, and also noticed that my free Pusher membership was running out of the allotted connections I had available. Fortunately, someone at Pusher was reading Hacker News and bumped up my connection count!

Early 2017 – Lawyers & moving out for the first time

Traffic was growing, and I started implementing a max amount of requests on a URL (500), since the SQLite database was getting very large (several gigabytes), and some users often forgot to remove the URL after they were done testing and moved to production! Around here I also noticed that the site was getting slow, and I noticed I had forgotten to add some indices in the database! After I added those, the site was a lot faster.

Around this time, I was also contacted by a lawyer representing a company where a developer had used Webhook.site for testing a credential validation and upload service. They forgot that webhook subscription was still in place when it was transferred to production, which had resulted in some very personal data being uploaded, and they wanted me to make sure it was removed. I removed the URL and related data and never heard from them again.

On the server side, I decided it was time to move the site to its own server, since it started interfering with my primary one. I chose the smallest size on DigitalOcean (512MB RAM), on which I installed Debian. Nginx was chosen as the Web server serving PHP 7.1 via FPM.

At this point, Webhook.site had around 70 daily users.

Late 2017 – Caching issues

I started running into various performance problems regarding Laravel, caching and Redis connectivity.

First, I couldn't figure out why the site was so slow. I had enabled Laravel's rate limiting feature, which by default caches a users' IP address and stores the amount of connection attempts so it can rate limit the connections.

As it turns out, I had forgot to change the default caching mechanism, which was disk cache. So each visit to the site caused Laravel to read and write a file to disk, which took up a bunch of IO.

As a result, I installed Redis and pointed the cache to it, which immediately improved performance.

Early 2018 – New year, new datastore

Traffic was now growing steadily, and the site had around 300-400 daily users at this point.

From the commit logs, I can see that I enabled Redis to use a UNIX socket instead of TCP connectivity. This improved performance quite a bit, since it didn't take up precious TCP connections that could be used to serve the site.

In March 2018, the amount of users had doubled again – around 600 daily active users – and SQLite just wasn't cutting it anymore; the database file was getting very large.

I had to switch to a different datastore. Considering the options – moving data from SQLite to MySQL wasn't as straightforward as I'd hoped – I chose Redis, since I calculated that total amount of data could fit on RAM if I only stored the last few days worth, which would be easy since Redis supports expiring keys.

I re-wrote a large portion of the application (including a migration script) and temporarily upgraded the DigitalOcean VPS to a 16 GB instance so it could store all the data in memory until the bulk of it expired. After a week or so, I downgraded to 1 GB RAM now that everything could fit in memory.

Mid 2018 – Self-hosted Socket.io

The amount of users doubled again, and even the increased amount of connections allowed to me by Pusher now wasn't enough, which resulted in users having to reload the app manually instead of being able to stream new requests in real-time.

I switched over to Laravel Echo Server, a Socket.io server written in Node.js, which has served me well to this day. I proxied it through Nginx and the site kept humming along.

Late 2018 – Accidental DDoS & HAProxy to the rescue

The site started taking up lots of time to keep running mainly due to a few users who accidentally deployed URLs to production, causing the site to be hit by large amounts of requests from many different IP addresses at once (or few IP addresses sending tons of traffic.)

I tried to implement a blocking mechanism in the firewall since even though Laravel's rate limiter worked fine, I wanted something that worked at the firewall level, so connections would be discarded before hitting PHP, which was eating up resources.

I also upgraded the server in December to 4 GB ram, which was just barely able to fit all the data in RAM. It mostly ran at close to 100% CPU.

The firewall blocking mechanism worked for a little while, but turned out to be very buggy – I was running iptables and UFW commands from PHP! – and I disabled the functionality and started thinking of alternative solutions.

At around this time, a user had apparently forgot to remove the URL from a test version of some sort of advertising solution deployed on mobile phones. Tens of thousands of mobile phones were constantly requesting the same endpoint, and it was ruining the site for everybody. Something had to be done. I needed something that could quickly drop incoming connections that matched the URL in question.

Having had experience with HAProxy in the past, I was well aware of how efficient it is compared to Nginx at acting as a proxy – up until now I had also used Nginx to forward Laravel Echo Server traffic. So I decided to try putting HAProxy in front of Nginx, and moving the Echo server proxy to HAProxy, and adding rules to the HAProxy configuration file that immediately dropped requests to the URL that caused trouble. That turned out to be a good decision.

CPU usage fell to under 30% immediately, resulting in the site loading instantly even though it was getting bombarded by requests – success.

April 2019 "DDoS" – nitty-gritty kernel tweaking

Around April 11, another surge of accidental traffic hit the server, apparently also from some sort of advertising software, where a bunch of popular apps were loading the same Webhook.site URL. I assumed this was just forgetfulness; someone forgot to remove a snippet of code before pushing to production.

Still running on a relatively small 4 GB/2-core VPS, I took a look at tweaking various default Linux configuration files, namely /etc/sysctl.conf and /etc/security/limits. At the bottom of this post, I've listed some links to resources that helped me find the right values.

Here's what I ended up with (I'll save a deeper explanation for a later post):

[pastacode lang="c" manual="vm.overcommit_memory%20%3D%201%0Afs.file-max%20%3D%202097152%0Anet.core.somaxconn%20%3D%204096%0Anet.ipv4.ip_local_port_range%C2%A0%3D%C2%A02000%2065000%0Anet.ipv4.tcp_rfc1337%20%3D%201%0Anet.ipv4.tcp_fin_timeout%C2%A0%3D%C2%A015%0Anet.ipv4.tcp_tw_recycle%20%3D%201%0Anet.ipv4.tcp_tw_reuse%20%3D%201%0Anet.netfilter.nf_conntrack_generic_timeout%C2%A0%3D%C2%A060%0Anet.ipv4.netfilter.ip_conntrack_tcp_timeout_established%C2%A0%3D%C2%A054000%0Anet.core.netdev_max_backlog%C2%A0%3D%C2%A04000%0Anet.ipv4.tcp_max_syn_backlog%C2%A0%3D%C2%A02048%0Anet.netfilter.nf_conntrack_tcp_timeout_close_wait%20%3D%2020%0Anet.netfilter.nf_conntrack_tcp_timeout_fin_wait%20%3D%2020%0Anet.netfilter.nf_conntrack_tcp_timeout_time_wait%20%3D%2020%0Anet.netfilter.nf_conntrack_max%20%3D%20524288%0Anet.ipv4.tcp_mem%20%3D%2065536%20131072%20262144%0Anet.ipv4.udp_mem%20%3D%2065536%20131072%20262144" message="/etc/sysctl.conf" highlight="" provider="manual"/]

Then, around 10 days later, the same thing happened, but this time, the site was able to keep serving visitors even though it was getting hammered. I had blocked the URL directly in HAProxy – which basically means it's returning a short error code, saving CPU cycles and bandwidth – and the server was able to keep up and saturate the 100mbit network connection.

Bandwidth graph during the days Webhook.site experienced very large amounts of traffic

After a few days, someone must have realised that they were bombarding Webhook.site with traffic and shut it off. So far, it hasn't happened again, and the site consumes its usual few megabits per second in traffic.

As of writing this article, Webhook.site now runs on a 4-core 8GB VPS and handles thousands of connections per second without breaking a sweat.

Daily and weekly unique users on Webhook.site from Google Analytics

Future plans

Thanks to the very generous supporters of the site on Patreon, I've been able to pour some money at upgrading the server to keep handling more traffic instead of just shutting it down. That, along with the various optimizations, has kept the site online, helping tens of thousands of visitors a month while still being fairly inexpensive to run as a hobby project.

It's also worth mentioning DigitalOcean again – here's my referral link where you can get $100 in credit – during all of this I've never heard a single complaint from them, even when the server was consuming 100mbit/s traffic for days!

With that being said, it has become quite clear that lots of people simply forget that they subscribed something to Webhook.site, and as a result, accidentally spamming the service in such a manner that is basically a DDoS. The longer Webhook.site keeps running, the more the server will keep receiving those old, long-forgotten webhook subscriptions. My plan for this is at some point to switch to using a wildcard CNAME record so that URLs will be in the format https://<UUID>.webhook.site. This will let me create an A record pointing to 127.0.0.1 (redirecting the traffic back to the sender) on a case by case basis, somewhat sidestepping the issue.

Additionally, lots can be done for scalability regarding infrastructure: I've kept everything on a single, smaller server basically as a matter of stubbornness and wanting to see how far I can push a single VPS. It would probably be more efficient to separate the services so that HAProxy, Redis, Nginx and Echo Server aren't competing for resources.

Finally, this has already taught me a lot, and I'm looking forward to see what else I can do to keep Webhook.site humming along if the visitor count keeps increasing.

Appendix: Resources for tweaking sysctl.conf

Feb 14 0 Solving Kubernetes DNS issues on systemd servers

For a while, I've been seeing messages like these  in the KubeDNS logs of a Kubernetes cluster. At the same time, I was also experiencing various DNS issues from the services running on the Kubernetes cluster.

dnsmasq[20]: Maximum number of concurrent DNS queries reached (max: 150)

At first, I tried to solve this by scaling up the number of KubeDNS pods:

kubectl scale deploy kube-dns --replicas=20 -nkube-system

This didn't change the amount of errors no matter how high I set the number of replicas.

systemd interferes with resolv.conf

What caused the issue was systemd shipping with its own name server, which interferes with the way KubeDNS expects DNS servers on your server to function.

On a default Ubuntu installation (18.04 or higher, I believe), the internal DNS server of systemd (127.0.0.53) is the only name server added to the /etc/resolv.conf file, since it then forwards to systemd's nameserver.

However, KubeDNS is dependent on the resolv.conf file to resolve names outside of Kubernetes.

This causes KubeDNS going into a loop, querying itself for every request, since 127.0.0.53 is a loopback IP.

We only saw the problem intermittently because some machines had been configured to have additional name servers than the local DNS server of systemd in resolv.conf, which mitigated the issue most of the time, so the error condition was only triggered randomly.

Solution: Use an alternate resolv.conf file

Luckily, systemd ships with an alternate resolv.conf file that actually contains a list of valid nameservers, and doesn't reference localhost. This file is very useful for scenarios like these where you do not want to use systemd's DNS server.

To use it with Kubernetes, you must specify an alternate resolv.conf path by utilizing the
--resolv-conf argument in your kubelet systemd service configuration.

Apply these steps on all Kubernetes nodes:

  1. As root, edit /etc/systemd/system/kubelet.service.d/10-kubeadm.conf
    • If KUBELET_EXTRA_ARGS is not appearing in the file, add the following line:
      Environment="KUBELET_EXTRA_ARGS=--resolv-conf=/run/systemd/resolve/resolv.conf"
    • Otherwise, add
      --resolv-conf=/run/systemd/resolve/resolv.conf

      to the end of the EXTRA_ARGS stanza.

  2. Execute systemctl daemon-reload to apply the changes to the service configuration.
  3. Restart kubelet to apply the changes: service kubelet restart
  4. Finally, remove or restart all the KubeDNS pods on your system with this oneliner:
    • kubectl get po -nkube-system | grep 'kube-dns' | cut -d " " -f1 -| xargs -n1 -P 1 kubectl delete po

      (Fair warning: this restarts all kube-dns pods, but only 1 at a time. It shouldn't cause disruptions to your cluster, but use with care.)

Note: This was fixed in Kubernetes 1.11, which automatically detects this failure scenario. If you use 1.11 or above, you should not need to use this fix.

Feb 10 3 Electron: How did we get here?

It’s extremely hard to write good, cross-platform desktop applications. And by applications I mean actual applications: On Windows that’s an .exe file, on Mac it’s an .app bundle and on Linux … I guess it’s an ELF format binary?

Slack, a popular chat application that's built with Electron.

And no, by application, I’m not talking about website wrapped in an actual app. I'm not talking about a single-page browser.

I'm definitely not talking about Electron.

You see, an Electron app is only mimicking being an application. Yes, with Electron, you’re getting an executable file to download when you go and get VS Code or Slack – and to anyone not knowing the difference, the Atom installer will look exactly the same as a native app ... until you install it.

A computer inside your computer

Once you begin using an Electron application, you’ll notice that it doesn’t really fit in: it will look completely different from most other applications on your computer. Most other applications have a standardised menubar; not so with Electron apps, because, in short, an Electron app is a pre-packaged version of Chrome that is designed to only run only one Web site. It includes a HTML renderer, a JavaScript parser, a Web Inspector and all sorts of other components you don’t care about – just so you get the experience of running a Web site as a desktop application.

Of course, you're already running all this anyway - inside your browser. And every Electron app will run an additional copy on top of that.

These days, browsers are virtual computers: they're a sandbox of functionality that's made available to Web sites through JavaScript, and browser developers are constantly trying to ward off new attacks that target your real computer. All these safety measures of trying to isolate malicious Web sites add up; all code has to pass through layers of abstractions in order to reach down to the "bare metal". It's the reason why these apps slow down your computer, even as browser manufacturers have improved the speed.

It's your only choice

Everybody is creating Electron apps these days. It’s the smart thing to do, really. HTML and CSS and Javascript is the de-facto cross platform graphical application development toolkit.

Yes, there’s Java, and QT, and sure, there’s other cross-platform UI toolkits, but there’s no real popular, universal solution.

If you want to write a console utility, you could use Go, or maybe C++, or an interpreted language like Python or Ruby. Plenty of choices. But a desktop app with a UI?

For applications like Slack (chat), VS Code or Atom (text editors), Hyper (a terminal emulator), I’d argue Electron is the only feasible choice.

There’s simply no alternative.

The commonality for all Electron apps is that they could run just as well as regular web apps in an actual browser, but there’s no real utility in doing so: Slack needs access to your camera, microphone, desktop (for screen sharing). VS Code and Atom need access to your files, and to run arbitrary commands for code linters, git, compiling and more. Some of these things you could do in-browser; for others, a step outside the browser is needed.

Access, OS integrations and performance – these are the big reasons why a desktop app would need to run outside the browser.

In a way, Electron is a hack for fulfilling the access limitations of Web browsers.

We have to go back

A digression: After I learnt QBasic (a variant of BASIC), my first programming language, in the late 90s, I stumbled upon something called Delphi. Others might have experience with Visual Basic, which is somewhat similar. What Delphi allowed me to do – and is the reason I actually view current Web development as very basic and limited today – is the fact that you could build a complete desktop application using drag and drop and the built-in code editor.

Delphi had a complete IDE with code completion and built-in documentation, things that came very late for Web development.

On Delphi Web sites, you could download thousands and thousands of “components” – mostly free or open source – to use in your application (alas, no package manager). Needed a way to make a specific type of network connection? Or all sorts of buttons, progress bars, rich text editors? There’s a component for that.

Screenshot of Delphi 7

Delphi 7, a software development IDE for Windows. Delphi was originally released in 1995.

There was even an acronym for this way of developing apps: RAD – Rapid Application Development. As it implies, making a Delphi app is fast.

On-screen, the app could of course be designed to fit on your screen depending on your resolution, window size and so forth – responsive design was around before the Web.

Obviously, Delphi had built-in database connectivity, so you could very easily make the text fields and content in the application connected to a database (of course, back then, there was Paradox and FoxPro, not MongoDB and Elasticsearch). There was no need to mess with grid systems, to write a JSON API that your Angular frontend fetches data from – all the stuff that distinguishes the Web from desktop applications.

Delphi even had cross platform compatibility, and still has, with Lazarus, an open-source clone of the Delphi series of IDEs. However, it was rough around the edges – and still is: care must be taken to ensure the quality of the user experience on the platforms you're targeting.

To be honest, having experienced development with things like Delphi, even back in the nineties… These days, it’s hard to appreciate anything about modern Web development besides how it's truly cross platform the way nothing else is.

Rapid Application Development

I see no real, technical reason why developing a graphical application shouldn’t also be graphical in the drag-and-drop way Delphi did in 1995.

We’ve seen drag-and-drop Web editors like Squarespace becoming hugely popular, and together with WordPress, these types of services have mostly killed the market for the traditional Web designer/Web master role.

Screenshot of Salesforce Lightning app builder

Salesforce Lightning app builder.

On platforms like Salesforce, we see new ways of developing applications, now you can actually build Salesforce applications using drag-and-drop. I think we’re just about getting there for simple business applications, but if you want to build something out of that realm, like a chat app or a text editor, you need to look elsewhere.

Oracle Application Builder screenshot

Oracle Application Builder - what RAD development like Delphi has transformed into. Everything has moved to the cloud - including your own data and applications.

The difference between the new breed of "application builders" and the old-school RAD apps: everything is in the cloud, so no money spent on infrastructure maintenance. But then you're locked to that cloud provider. Want to move? You're SOL.

At some point, the RAD way of developing applications had to make a comeback. At some point, people would notice how much effort it actually is to create a Web app. And it looks like the Web is getting there.

When will it get better?

Electron’s number 1 problem is performance – and developers hasn't cracked the performance part yet: while extremely impressive and feature-rich, applications like Atom and VS Code require absolutely enormous amounts of RAM to do simple things, like just starting – or opening small documents.

A common complaint about Slack is how slow it is and how many resources it uses.

It's not a pretty sight to monitor the RAM usage of an Electron app.

At some point, and one could argue we're there already, we’ll begin to see Electron apps becoming feasible for not just text editors, but also image editors and 3D games – or maybe hardware speed will simply begin to outpace Electron’s hunger for CPU cores and RAM. It might be a mix of both.

While I think Electron can get us some of the way, it's not enough. Bundling a full browser engine with each and every application is a non-starter. Most people won't run more than 2 Electron apps at a time, so it’s currently somewhat acceptable, but in the longer run we need a better platform for this.

Some projects, like DeskGap, are attempting to leverage the browser stack of the operating system, thereby taking advantage of the browser code that's in memory anyway. But it comes at a cost: On Windows, DeskGap only runs on Windows 10 versions from October 2018 or later, leaving out the huge swaths of computers still running Windows 7 or 8.

Perhaps a new standard emerges that makes browsers expand to be able to provide desktop experiences for Web apps?

Maybe the operating systems themselves move to provide native support for HTML, JS and CSS?

Is it far-fetched to believe that JavaScript will become the operating system?

We need to invest in cross-platform UI frameworks

I sincerely hope that for desktop applications, something better comes along than HTML and CSS. I think it's too cumbersome and time consuming to create applications. The Web was made for content, not applications, and the more we try forcing all our computing into it, the more the complexity grows.

I think the role of desktop applications – versus Web apps – is to fit in and integrate with the rest of your system (and especially the applications).

One of the ways to get to application building Nirvana will be to improve and invest in cross-platform application UI frameworks. Until now, all the energy has been spent on the Web, because it's universal. It's there anyways: for Google, shovelling money into a browser is a win-win situation. But it doesn't mean that all applications must be Web applications.

Will a genius new way of building native user interfaces be created by the Go community, for example? I sure hope so.

But for now, Electron is the best we have. And my laptop is burning my lap.

Sep 30 1 Tips and tricks for htop

If you've ever logged in to a Linux server to check what's going on, you're probably using htop, a text-based system monitoring tool for Unix based systems.

It runs on most Unix systems, including OS X, via Homebrew: brew install htop

For apt-based systems, like Debian and Ubuntu: apt-get install htop

htoprunning in a byobu session; numbers correspond to list below

Basic Usage

  1. The graph at the top display the CPU usage (each CPU core gets a line, my CPU was 4 hyper threads = 4 lines). For an explanation of what the different colors indicate, see below.
  2. To the right of the graph, the amount of processes and threads, load average (1, 5, 15 mins) and the system uptime is shown.
  3. Has the columns. How to add more is shown below.
  4. The default columns:
    1. PID is the process ID
    2. PRI ("Priority") is -20 (highest), 19 (lowest)
    3. VIRT is total theoretical (virtual) memory mapped by program. Can be many times greater than the actual amount of physical memory.
    4. RES ("Resident") shows the actual amount of physical memory used
    5. S ("Status")
      S = sleeping (idle)
      R = running
      D = disk sleep (uninterruptible)
      Z = zombie (waiting for parent to read its exit status)
      T = traced or suspended (e.g by SIGTSTP)
      W = paging
      ? = unknown
    6. CPU% is the total amount of  CPU usage
    7. TIME is how much total cpu time that process has been using
  5. The process path and name. See below for shortcuts to display environment, etc.
  6. At the bottom are the menu items: mouse can be used in addition to F keys, if enabled.

CPU and Memory graph colors

CPU – Default mode

  • Blue: low priority processes (nice > 0)
  • Green: normal (user) processes
  • Red: kernel time (kernel, iowait, irqs...)
  • Orange: virt time (steal time + guest time)

CPU – Detailed mode

If you have enabled "Detailed CPU time" in Setup > Display Options, the colors mean the following:

  • Blue: low priority threads (nice > 0)
  • Green: normal (user) processes
  • Red: system (kernel) processes
  • Yellow: IRQ time
  • Magenta: Soft IRQ time
  • Grey: IO Wait time
  • Cyan: Steal time/Guest time

Memory

  • Green: Used memory pages
  • Blue: Buffer pages
  • Orange: Cache pages
  • Grey: Free (unused)

Hide threads

Per default htop shows threads of non-system programs, but this can result in the list being very verbose (leading to a bunch of duplicate program names in green text) and the program becoming hard to navigate.

To turn off thread visibility go to Setup > Display Options and check off both "Hide kernel threads" and "Hide userland process threads".

Alternatively, kernel and user threads can be toggled with K and H, respectively.

Use the mouse

While htop is a text-mode application, on most terminals, you can use a mouse cursor to select processes as well as click the menu keys and navigate the Setup menu.

Selecting one or more processes

With the SPACE key, you can select multiple processes. You can them kill them via F9.

Other things to do with a selected process:

  • To view the environment variables of a specific process, just navigate to the process via the arrow keys and press E.
  • Set IO priority via I.
  • List open files with lsof with L.
  • Trace syscalls with S.
  • Toggle path with P.

Add some more columns

Per default, htop doesn't show all its information. To add more columns, go to Setup > Columns and choose some new ones. Which to choose? Here's the ones I commonly use:

  • PERCENT_CPU, PERCENT_MEMORY – shows how much a program is using in percentages
  • IO_RATE – shows how much disk IO the process is using

Filter by users

To select and view a specific users' processes, type U.

Aug 5 1 An introduction to Byobu

Byobu advertises itself as a terminal multiplexer and a terminal window manager. But what do those words actually mean?

If we start from scratch, a terminal is the text-based interface to computers. On Windows computers, it's called the Command Prompt, or cmd.exe. While text-based interfaces could be seen as the "old-fashioned" way to interact with computers, for programmers, system administrators and in many other technical fields, terminals (and text-based user interfaces) are still utilized widely due to their efficiency and speed of use.

As a layer on top of the terminal, programs such as screen and, later, tmux were created to allow users to better manage their terminals: with them, you could disconnect from a server, and still have your program running, and then connect to it later as if you were never gone.

You could split the screen in several parts (that's the multiplex part), so you can change a configuration file while streaming a log file and watching your changes take effect in real time, just like you're managing and dragging windows around on your Mac or PC.

You can also have several desktops - or windows - that can be switched between, just like on your Mac. That's the window manager part.

Byobu is again a layer on top of screen and tmux. Think of it as an extension: Byobu is a collection of scripts and utilities that enhances the behaviour of these programs.

Installing byobu

On Debian, Ubuntu and similar Linux distributions: apt-get install byobu

For other distributions, see the official site.

On Mac: first get Homebrew, then brew install byobu

First run

When running byobu for the first time, it will start with just your shell in a single window. The bottom of your screen has the status bar, which displays your OS and version, a list of open windows, and various system metrics like pending updates, RAM usage and time and date.

To change these, press F9, choose Toggle Status Notifications, and select/unselect the ones you want.

Something you should do first is to choose Byobu's escape sequence. That's a special key that can trigger some of Byobu's functionality. Think of it as a shortcut key. Type CTRL-A, or run byobu-ctrl-a . If you're in doubt, use "Emacs mode", which let's you keep using CTRL-A to navigate text. Byobu's default escape sequence is then F12, which you'll use in a minute.

You can also make Byobu start automatically with byobu-enable. It's useful on servers where you probably don't have a lot of different terminal windows open, and want your terminal history and programs to be running between sessions. To disable that, use byobu-disable.

Basic window management

Creating a window: F2

Create a horizontal split pane: SHIFT-F2 (or F12-|)

Create a vertical split pane: CTRL-SHIFT-F2 (or F12-%)

Go back and forward through window list: F3 and F4

Go back and forward through split panes: SHIFT-F3 and SHIFT-F4

More window management

Close a window, or a pane: CTRL-D

Toggle between layout grid templates: SHIFT-F8

Scrolling: SHIFT-ALT-Page-down/up

Search down (while scrolling): /

Search up (while scrolling): ?

Naming a window: F8

Fullscreen a pane: F12 then Z

To visually navigate your windows, with previews: F12 then S, then arrow keys, numbers

Mouse mode

Type F12, then : (to enable the internal terminal), then set mouse on (for other commands, list-commands) then ENTER to enable mouse mode. With it you can do several actions with the mouse:

  • Switch between active panes and windows. Click on a window name or pane to switch.
  • Scroll, with the mouse wheel or trackpad
  • Resize panes by dragging and dropping

Display the time

To display the time in big letters, press F12 then T.

Quitting

To exit byobu, leaving your session running in the background (and logging out, if you're in a SSH session), F6. (To avoid logging out, use SHIFT-F6.)

To completely kill your session, and byobu in the background, type F12 then : and type kill-server.

More information


Jul 17 19 What is a Webhook?

The Webhook is the Web's way to integrate completely different systems in semi-real time.

As time has passed, the Web (or more precisely, HTTP, the protocol used for requesting and fetching the Web site you're currently reading) has become the default delivery mechanism for almost anything that's transferred over the Internet.

Webhooks are used everywhere

Webhooks are used in lots of places. Here's some examples of where Webhooks can deliver value:

  • Notifying an ordering system that a payment has been completed, so the order can be shipped
  • Adding a customer to a Relations Management system after they sign up on a Web site
  • Transmitting events from e.g. a newsletter campaign and deliver it to an analytics platform

If it's on a network, it can send Webhooks

Refrigerators, industrial control systems, lightbulbs, speakers, routers, anti-virus programs – everything is controlled via the Web these days. It's not because HTTP is perfect, fast, or fault tolerant, rather, it's because everybody speaks it. It's very easy to send and receive a HTTP call. In fact, many programming languages can do it in a single line of code.

The Web page you're viewing right now – its URL being https://simonfredsted.com/1583 – might as well have been a Webhook. When your browser sends a request to it, my Web server sends a response back containing text, images and layout information.

The only difference between this Web site and an actual Webhook is that the sender is not a browser, but some sort of automated system, and probably contains some additional data rather than just which blog post you want to see. And in response, the system would have received a bunch of raw data rather than a formatted Web document.

With a URL, you can therefore send and receive information to and from any other system, often in the form of an API, a defined set of functions (where each is a specific URL) that can act on a system.

But what if a regular API, where I contact it myself and receive the data at my leisure, isn't enough? What if I don't want to constantly ping the API for data – what if it could just let me know when something changes? As that became a growing need, the word for applications exchanging information automatically like this came to be known as a Webhook. Something happened? Ping my Webhook and I'll know!

A general method of setting them up also started taking form: subscriptions. On most systems, this involves setting these subscriptions up by – you guessed it – a personal fax to the system operator, who can then program it into the mainframe!

Sorry, just kidding. Webhooks are of course also set up via the Web, and many sites offer either a user interface for setting them up, or even an API: that way, other applications can subscribe and unsubscribe to your application as they please.

Implementation is up to the developer

Webhooks aren't a standard, but most developers implement them in the same way: When an event happens in your program that another program is subscribed to, go though each subscription and check whether it has access to view that object, and if so, send a HTTP request to the subscriber's URL.

The content of the request can then be either the actual content (mostly in JSON or XML format), or a reference to the content that can be fetched later: something happened, but call this other URL to see exactly what happened. Doing it like that can save on bandwidth if you batch requests later, for example.

Obviously, and the whole reason we're doing this: it is then up to the subscriber to carry out an action on the Webhook if it is needed.

A diagram depicting a common way to handle webhook subscriptions in a scalable, event-based manner

A diagram depicting a common way to handle webhook subscriptions in a scalable, event-based manner

Did my toaster send a Webhook about my toast finishing? Better send a text via Trello to remind me there's breakfast! (Maybe I have a bad short term memory. What's it to you?)

But what happens if problems occur along the way?

Error handling is important for a robust system

If you don't take certain precautions, Webhooks are very prone to failure and lost data.

If I'm suddenly unable to send webhooks to my subscriber, it might be a good idea to re-send it later at some point. But how long should I wait? If I send it 1 second after, the subscriber is probably still down. Maybe 10 seconds or 10 minutes is better for a specific use case. Maybe they'll be completely bombarded by my retries and they'll be worse off. Maybe random retry times, or constantly increasing (e.g. exponential backoff) ones would solve the problem.

You might also not want to keep sending a Webhook an infinite amount of times. That is a long time, after all.

Speaking of time: it might be worth it to consider timeouts for your use-case. Even though you're great at implementing fast software, maybe your customers aren't, so set a timeout that's reasonable for all parties, or you'll risk delivering duplicate Webhooks to your customers when retrying (due to said timeouts), or maybe they'll never get their data.

Maybe you want to give control to your subscribers: let them view a log of the failed requests, and let them re-send specific requests at their leisure.

Webhooks should always be queued

All of these ways of increasing robustness rely on a way to queue your calls or process them asynchronously: don't send them while delivering the request that triggers it, for example. Otherwise the user would be waiting on both the system doing its thing – and the Webhook subscriber(s) responding! Again: you can't control how long the recipient takes to answer.

Queuing is also a good idea on the subscriber side. You can't be sure that those you're subscribing to will wait forever to hand over the requests; you need to answer webhooks quickly, a couple seconds should be more than plenty to queue your action and return a response. So queue your actions, too!

As they say: your webhook should do almost nothing.

How to test Webhooks

What if you want to get to started with Webhooks, but don't have a server (that's open to the Internet) set up to receive them? What if you're developing a Webhook-based system, and you just want to see whether it successfully sends out Webhook requests?

For that use case, I created Webhook.site back in March 2016 – I often needed to test webhooks, so I decided to build my own site that worked like I wanted

Later, more features have been added to Webhook.site, like transformation and redirecting, sending emails, custom workflows, and even scripting. That way, you don't have to worry about managing servers and uptime just to, say, convert a Webhook to an email (or vice versa.), send a push notification or running a SSH command on a system. You simply use Webhook.site to automate any given Webhook.

What can I use Webhooks for?

Almost every cloud service has some sort of Webhook functionality, but if you're not a developer, they're hard to use. For that, check out Webhook.site mentioned in the previous paragraph. There's also IFTTT (if this, then that) or Zapier – under the hood, they use Webhooks.

What do you use Webhooks for? Let me know in the comments!

May 14 1 6 takeaways from Kubecon Europe 2018

I attended Kubecon/CloudNative Con last week, and it was a great way to see how various large and small companies – all 4000+ participants – are using Kubernetes in their systems architecture, what problems they're having and how they're solving them. Interestingly enough, a lot of the issues we've been having at work are the same we saw at Kubecon.

Everyone's standardising on Kubernetes

What's increasingly clear to me, though, is that Kubernetes is it. It's what everyone is standardising on, especially large organisations, and it's what the big cloud providers are building hosted versions of. If you aren't managing your infrastructure with Kubernetes yet, it's time to get going.

Here's a roundup of the trends at Kubecon as well as some of my learnings.

Wasn't there?

If you didn't have a chance to go, take a look at Alen Komljen's list of 10 recommended talks, and go view the full list of videos here.

1. Monitoring

As for Kubernetes itself, I often feel like I'm barely scratching the surface of the things it can do, and it's hard to get a good picture of everything since Kubernetes is so complex.

What's more, once you are running it in production, you don't just need to know what Kubernetes can do, you also start seeing the things Kubernetes can't do.

One of those things is monitoring and a general insight on what happens behind the scenes.

Coming from administering servers in the classic way, I feel that both a lot of the things I used to do has been abstracted away – and hidden away.

A good monitoring solution takes care of that. One of the tools that are very popular is Sysdig, which allows you to get a complete picture on what's happening with your services running on your cluster.

These tools typically use a Linux kernel extension that allows it to track what each container is doing: network connections, executions, filesystem access, etc. They're typically integrated with Kubernetes itself, so you can't just see the Docker containers, you can also see pods, namespaces, etc.

Sysdig even allows you to set up rules based on container activity, and you can then capture a "Sysdig Trace", so you can go back in time and see exactly which files a container downloaded or which commands were ran. A feature like that is great for debugging, but also for security.

Open source monitoring tools like Prometheus were also talked about a lot, but it seems like a lot of work to set up and manage compared to the huge amount of functionality commercial software gives you out of the box. It's definitely something I'll be looking at.

2. Security

Like monitoring, another thing that reveals the young age of Kubernetes is the security story. I feel like security is something that's looked past when deploying Kubernetes, mainly because it's difficult.

The myth about Docker containers being secure by default is starting to go away. As the keynote by Liz Rice about Docker containers running as root showed, it's easy to make yourself vulnerable by configuring your Kubernetes deployments wrong – 86% of containers on DockerHub run as root.

What can you do about it?

  • Take a look at the CIS Kubernetes security guidelines
  • Have a good monitoring solution that lets you discover intruders
  • Use RBAC
  • Be wary of external access to your cluster API and dashboard
  • Further sandboxing with gVisor, KataContainers, but comes at a performance cost
  • Mind the path of data. As an example, container logs go directly from stdout/stderr to kubelet to be read by the dashboard or CLI, which could be vulnerable.
  • Segment your infrastructure: In the case of kernel vulnerabilities like Meltdown, there's not much you can do but segment different workloads via separate clusters and firewalls.

3. Git Push Workflows

Everything old is new again. An idea that has gotten a large amount of traction at Kubecon is Git Push Workflows, which is mostly about testing, building and deploying services based on actions carried out in Git via hooks.

Gitkube

You don't even need a classic tool like Jenkins. Just push to Kubernetes: with gitkube, you can do just that, and Kubernetes takes care of the rest. Have a Dockerfile for running unit tests, a Dockerfile for building a production image and you're close to running your whole CI pipeline directly on Kubernetes.

Jenkins X

Nevertheless, the next generation of cloud-native CI tools have emerged, the latest one being Jenkins X, which takes out all the complexity of building a fully Kubernetes based CI pipeline, complete with test environments, Github integration and Kubernetes cluster creation. It's pretty neat if you're starting out from scratch.

Some things still aren't straight forward, like secrets management. Where do they go, how are they managed? What about Kubernetes or Helm templates, do they live in your services repository, or somewhere else?

4. DevOps & teams structure

A cool thing about Kubecon is that you get an insight into how companies are running their Kubernetes clusters, structuring their teams and running their services.

In the case of Zalando, most teams have one or more Kubernetes cluster at their disposal, managed by a dedicated team that maintains them, which includes tasks like testing and upgrading to the newest version every few months – something that could perhaps be looked over by busy teams focused on writing software.

The way to go, it seems, is to give each teams as much freedom and flexibility as possible, so they can concentrate on their work, and let dedicated teams focus on the infrastructure: Let's be honest, Kubernetes, and the complexity it brings, can be a large time sink for a development team that's trying to get some work done.

5. Cluster Organisation

It goes without saying, but I wasn't aware of it when I first started using Kubernetes: You can have a lot of clusters!

One per team, one per service, or several per service: it's up to you. At CERN, there's currently about 210 clusters.

While there's some additional overhead involved, it can help you improving security by segregating your environments and make it easier to upgrade to newer Kubernetes versions.

6. Service Mesh

While Kubernetes was designed for running any arbitrary workload in a scalable fashion, it wasn't designed explicitly for running a microservice architecture, which is why, once your architecture starts getting more complex, you see the need for Service Mesh software like Istio, Linkerd and the newer, lightweight Conduit.

Why use a service mesh? Microservices are hard! In a microservice world, failures are most often found in the interaction between the microservices. Service Mesh software is designed to help you dealing with inter-service issues such as discoverability, canary deployments and authentication.

May 7 8 Automating Cloud infrastructure with Terraform

When you start using cloud hosting solutions like Amazon Web Services, Microsoft Azure or Rackspace Cloud, it doesn't take long to feel overwhelmed by the choice and abundance of features of the platforms. Even worse, the initial setup of your applications or Web sites on a cloud platform can be very cumbersome; it involves a lot of clicking, configuring and discovering how the different parts fit together.

With tools like Terraform, building your infrastructure becomes a whole lot easier and manageable. Essentially, you are writing down a recipe for your infrastructure: Terraform allows system administrators to sit down and script their whole infrastructure stack, and connect the different parts together, just like assigning a variable in a programming language. Instead, with Terraform, you're assigning a load balancer's backend hosts to a list of servers, for example.

In this tutorial I'll walk you through a configuration example of how to set up a complete load balanced infrastructure with Terraform, and in the end you can download all the files and modify it to your own needs. I'll also talk a little about where you can go from here if you want to go further with Terraform.

You can download all the files needed for this how-to on Github.

Getting up and running

To start using Terraform, you'll need to install it. It's available as a single binary for most platforms, so download the zip file and place it somewhere in your PATH, like /usr/local/bin. Terraform runs completely on the command-line, so you'll need a little experience executing commands on the terminal.

Variables

A core part of Terraform is the variables file, variables.tf, which is automatically included due to the file name. It's a place where you can define the hard dependencies for your setup, and in this case we have two:

  1. a path to a SSH public key file,
  2. the name of the AWS region we wish to create our servers in.

Both of these variables have defaults, so Terraform won't ask you to define them when running the planning step which we'll get to in a minute.

Create a folder somewhere on your harddrive, create a new file called variables.tf, and add the following:

[pastacode lang="bash" manual="variable%20%22public_key_path%22%20%7B%0A%20%20description%20%3D%20%22Enter%20the%20path%20to%20the%20SSH%20Public%20Key%20to%20add%20to%20AWS.%22%0A%20%20default%20%3D%20%22~%2F.ssh%2Fid_rsa.pub%22%0A%7D%0A%0Avariable%20%22aws_region%22%20%7B%0A%20%20description%20%3D%20%22AWS%20region%20to%20launch%20servers.%22%0A%20%20default%20%20%20%20%20%3D%20%22eu-central-1%22%0A%7D" message="variables.tf" highlight="" provider="manual"/]

Main file

Terraform's main entrypoint is a file called main.tf, which you'll need to create. Add the following 3 lines:

[pastacode lang="bash" manual="provider%20%22aws%22%20%7B%0A%20%20region%20%3D%20%22%24%7Bvar.aws_region%7D%22%0A%7D" message="" highlight="" provider="manual"/]

This clause defines the provider. Terraform comes bundled with functionality for some providers, like Amazon Web Services which we're using in this example. One of the things you can configure it with is the default region, and we're getting that from the variables file we just created. Terraform looks for a variables.tf file and includes it automatically. You can also configure AWS in other ways, like explicitly adding an AWS Access Key and Secret Key, but in this example we'll add those as environment variables. We'll also get to those later.

Network

Next we'll start adding some actual infrastructure, in Terraform parlance that's called a resource:

[pastacode lang="bash" manual="resource%20%22aws_vpc%22%20%22vpc_main%22%20%7B%0A%20%20cidr_block%20%3D%20%2210.0.0.0%2F16%22%0A%20%20%0A%20%20enable_dns_support%20%3D%20true%0A%20%20enable_dns_hostnames%20%3D%20true%0A%20%20%0A%20%20tags%20%7B%0A%20%20%20%20Name%20%3D%20%22Main%20VPC%22%0A%20%20%7D%0A%7D%0A%0Aresource%20%22aws_internet_gateway%22%20%22default%22%20%7B%0A%20%20vpc_id%20%3D%20%22%24%7Baws_vpc.vpc_main.id%7D%22%0A%7D%0A%0Aresource%20%22aws_route%22%20%22internet_access%22%20%7B%0A%20%20route_table_id%20%20%20%20%20%20%20%20%20%20%3D%20%22%24%7Baws_vpc.vpc_main.main_route_table_id%7D%22%0A%20%20destination_cidr_block%20%20%3D%20%220.0.0.0%2F0%22%0A%20%20gateway_id%20%20%20%20%20%20%20%20%20%20%20%20%20%20%3D%20%22%24%7Baws_internet_gateway.default.id%7D%22%0A%7D%0A%0A%23%20Create%20a%20public%20subnet%20to%20launch%20our%20load%20balancers%0Aresource%20%22aws_subnet%22%20%22public%22%20%7B%0A%20%20vpc_id%20%20%20%20%20%20%20%20%20%20%20%20%20%20%20%20%20%20%3D%20%22%24%7Baws_vpc.vpc_main.id%7D%22%0A%20%20cidr_block%20%20%20%20%20%20%20%20%20%20%20%20%20%20%3D%20%2210.0.1.0%2F24%22%20%23%2010.0.1.0%20-%2010.0.1.255%20(256)%0A%20%20map_public_ip_on_launch%20%3D%20true%0A%7D%0A%0A%23%20Create%20a%20private%20subnet%20to%20launch%20our%20backend%20instances%0Aresource%20%22aws_subnet%22%20%22private%22%20%7B%0A%20%20vpc_id%20%20%20%20%20%20%20%20%20%20%20%20%20%20%20%20%20%20%3D%20%22%24%7Baws_vpc.vpc_main.id%7D%22%0A%20%20cidr_block%20%20%20%20%20%20%20%20%20%20%20%20%20%20%3D%20%2210.0.16.0%2F20%22%20%23%2010.0.16.0%20-%2010.0.31.255%20(4096)%0A%20%20map_public_ip_on_launch%20%3D%20true%0A%7D" message="Network setup" highlight="" provider="manual"/]

To contain our setup, an AWS Virtual Private Cloud is created and configured with an internal IP range, as well as DNS support and a name. Next to the resource clause is aws_vpc, which is the resource we're creating. After that is the identifier, vpc_main, which is how we'll refer to it later.

We're also creating a gateway, a route and two subnets: one for public internet-facing services like the load balancers, and a private subnet that don't need incoming network access.

As you can see, different parts are neatly interlinked by referencing them like variables.

Trying it out

At this point, we can start testing our setup. You'll have two files in a folder, variables.tf and main.tf with the content that was just listed. Now it's time to actually create it in AWS.

To start, enter your AWS Access Keys as environment variables in the console, simply type the following two lines:

export AWS_ACCESS_KEY_ID="AKIA..."
export AWS_SECRET_ACCESS_KEY="Your secret key"

Next, we'll create the Terraform plan file. Terraform will, with your AWS credentials, check out the status of the different resources you've defined, like the VPC and the Gateway. Since it's the first time you're running it, Terraform will instill everything for creation in the resulting plan file. Just running the plan command won't touch or create anything in AWS.

terraform plan -o terraform.plan

You'll see an overview of the resources to be created, and with the -o terraform.plan argument, the plan is saved to a file, ready for execution with apply.

terraform apply terraform.plan

Executing this command will make Terraform start running commands on AWS to create the resources. As they run, you'll see the results. If there's any errors, for example you already created a VPC with the same name before, you'll get an error, and Terraform will stop.

After running apply, you'll also see a new file in your project folder: terraform.tfstate – a cache file that maps your resources to the actual ones on Amazon. You should commit this file to git if you want to version control your Terraform project.

So now Terraform knows that your resources were created on Amazon. They were created with the AWS API, and the IDs of the different resources are saved in the tfstate file – running terraform plan again will result in nothing – there's nothing new to create.

If you change your main.tf file, like changing the VPC subnet to 192.168.0.0/24 instead of 10.0.0.0/16, Terraform will figure out the necessary changes to carry out in order to to update the resources. That may result in your resources (and their dependents) being destroyed and re-created.

More resources

Having learnt a little about how Terraform works, let's go ahead and add some more things to our project.

We'll add 2 security groups, which we'll use to limit network access to our servers, and open up for public load balancers using the AWS ELB service.

[pastacode lang="bash" manual="%23%20A%20security%20group%20for%20the%20ELB%20so%20it%20is%20accessible%20via%20the%20web%0Aresource%20%22aws_security_group%22%20%22elb%22%20%7B%0A%20%20name%20%20%20%20%20%20%20%20%3D%20%22sec_group_elb%22%0A%20%20description%20%3D%20%22Security%20group%20for%20public%20facing%20ELBs%22%0A%20%20vpc_id%20%20%20%20%20%20%3D%20%22%24%7Baws_vpc.vpc_main.id%7D%22%0A%0A%20%20%23%20HTTP%20access%20from%20anywhere%0A%20%20ingress%20%7B%0A%20%20%20%20from_port%20%20%20%3D%2080%0A%20%20%20%20to_port%20%20%20%20%20%3D%2080%0A%20%20%20%20protocol%20%20%20%20%3D%20%22tcp%22%0A%20%20%20%20cidr_blocks%20%3D%20%5B%220.0.0.0%2F0%22%5D%0A%20%20%7D%0A%20%20%0A%20%20%23%20HTTPS%20access%20from%20anywhere%0A%20%20ingress%20%7B%0A%20%20%20%20from_port%20%20%20%3D%20443%0A%20%20%20%20to_port%20%20%20%20%20%3D%20443%0A%20%20%20%20protocol%20%20%20%20%3D%20%22tcp%22%0A%20%20%20%20cidr_blocks%20%3D%20%5B%220.0.0.0%2F0%22%5D%0A%20%20%7D%0A%0A%20%20%23%20Outbound%20internet%20access%0A%20%20egress%20%7B%0A%20%20%20%20from_port%20%20%20%3D%200%0A%20%20%20%20to_port%20%20%20%20%20%3D%200%0A%20%20%20%20protocol%20%20%20%20%3D%20%22-1%22%0A%20%20%20%20cidr_blocks%20%3D%20%5B%220.0.0.0%2F0%22%5D%0A%20%20%7D%0A%7D%0A%0A%23%20Our%20default%20security%20group%20to%20access%20the%20instances%20over%20SSH%20and%20HTTP%0Aresource%20%22aws_security_group%22%20%22default%22%20%7B%0A%20%20name%20%20%20%20%20%20%20%20%3D%20%22sec_group_private%22%0A%20%20description%20%3D%20%22Security%20group%20for%20backend%20servers%20and%20private%20ELBs%22%0A%20%20vpc_id%20%20%20%20%20%20%3D%20%22%24%7Baws_vpc.vpc_main.id%7D%22%0A%0A%20%20%23%20SSH%20access%20from%20anywhere%0A%20%20ingress%20%7B%0A%20%20%20%20from_port%20%20%20%3D%2022%0A%20%20%20%20to_port%20%20%20%20%20%3D%2022%0A%20%20%20%20protocol%20%20%20%20%3D%20%22tcp%22%0A%20%20%20%20cidr_blocks%20%3D%20%5B%220.0.0.0%2F0%22%5D%0A%20%20%7D%0A%0A%20%20%23%20HTTP%20access%20from%20the%20VPC%0A%20%20ingress%20%7B%0A%20%20%20%20from_port%20%20%20%3D%2080%0A%20%20%20%20to_port%20%20%20%20%20%3D%2080%0A%20%20%20%20protocol%20%20%20%20%3D%20%22tcp%22%0A%20%20%20%20cidr_blocks%20%3D%20%5B%2210.0.0.0%2F16%22%5D%0A%20%20%7D%0A%20%20%0A%20%20%23%20Allow%20all%20from%20private%20subnet%0A%20%20ingress%20%7B%0A%20%20%20%20from_port%20%20%20%3D%200%0A%20%20%20%20to_port%20%20%20%20%20%3D%200%0A%20%20%20%20protocol%20%20%20%20%3D%20%22-1%22%0A%20%20%20%20cidr_blocks%20%3D%20%5B%22%24%7Baws_subnet.private.cidr_block%7D%22%5D%0A%20%20%7D%0A%0A%20%20%23%20Outbound%20internet%20access%0A%20%20egress%20%7B%0A%20%20%20%20from_port%20%20%20%3D%200%0A%20%20%20%20to_port%20%20%20%20%20%3D%200%0A%20%20%20%20protocol%20%20%20%20%3D%20%22-1%22%0A%20%20%20%20cidr_blocks%20%3D%20%5B%220.0.0.0%2F0%22%5D%0A%20%20%7D%0A%7D" message="" highlight="" provider="manual"/]

Our elb security group is only reachable from port 80 and 443, HTTP and HTTPS, while the default one only has public access on port 22, SSH. It also allows access from the whole VPC (including public facing load balancers) on port 80, as well as full access from other servers. Both allow all outgoing traffic.

After the ELBs, we need to define a public key which is placed on the instances we create later. Here, we use the pre-defined variable to specify the path on the local filesystem.

[pastacode lang="bash" manual="resource%20%22aws_key_pair%22%20%22auth%22%20%7B%0A%20%20key_name%20%20%20%3D%20%22default%22%0A%20%20public_key%20%3D%20%22%24%7Bfile(var.public_key_path)%7D%22%0A%7D" message="" highlight="" provider="manual"/]

Modules

You probably thought that there was a lot of duplicate code in those two security groups, and you're right. To combat that, Terraform provides custom modules, which is basically like including files.

Since we need to configure quite a few things in our EC2 instances, but the things we configure are almost always the same across them, we'll create a module for our instances. Do do that, create a new folder called instance.

In the instance folder, create 3 new files:

[pastacode lang="bash" manual="variable%20%22private_key_path%22%20%7B%0A%20%20description%20%3D%20%22Enter%20the%20path%20to%20the%20SSH%20Private%20Key%20to%20run%20provisioner.%22%0A%20%20default%20%3D%20%22~%2F.ssh%2Fid_rsa%22%0A%7D%0A%0Avariable%20%22aws_amis%22%20%7B%0A%20%20default%20%3D%20%7B%0A%20%20%20%20eu-central-1%20%3D%20%22ami-060cde69%22%0A%20%20%7D%0A%7D%0A%0Avariable%20%22disk_size%22%20%7B%0A%20%20default%20%3D%208%0A%7D%0A%0Avariable%20%22count%22%20%7B%0A%20%20default%20%3D%201%0A%7D%0A%0Avariable%20%22group_name%22%20%7B%0A%20%20description%20%3D%20%22Group%20name%20becomes%20the%20base%20of%20the%20hostname%20of%20the%20instance%22%0A%7D%0A%0Avariable%20%22aws_region%22%20%7B%0A%20%20description%20%3D%20%22AWS%20region%20to%20launch%20servers.%22%0A%20%20default%20%20%20%20%20%3D%20%22eu-central-1%22%0A%7D%0A%0Avariable%20%22instance_type%22%20%7B%0A%20%20description%20%3D%20%22AWS%20region%20to%20launch%20servers.%22%0A%20%20default%20%20%20%20%20%3D%20%22t2.small%22%0A%7D%0A%0Avariable%20%22subnet_id%22%20%7B%0A%20%20description%20%3D%20%22ID%20of%20the%20AWS%20VPC%20subnet%20to%20use%22%0A%7D%0A%0Avariable%20%22key_pair_id%22%20%7B%0A%20%20description%20%3D%20%22ID%20of%20the%20keypair%20to%20use%20for%20SSH%22%0A%7D%0A%0Avariable%20%22security_group_id%22%20%7B%0A%20%20description%20%3D%20%22ID%20of%20the%20VPC%20security%20group%20to%20use%20for%20network%22%0A%7D" message="instance/variables.tf" highlight="" provider="manual"/]

[pastacode lang="bash" manual="resource%20%22aws_instance%22%20%22instance%22%20%7B%0A%20%20count%20%3D%20%22%24%7Bvar.count%7D%22%0A%0A%20%20instance_type%20%20%20%20%20%20%20%20%20%20%3D%20%22%24%7Bvar.instance_type%7D%22%0A%20%20ami%20%20%20%20%20%20%20%20%20%20%20%20%20%20%20%20%20%20%20%20%3D%20%22%24%7Blookup(var.aws_amis%2C%20var.aws_region)%7D%22%0A%20%20key_name%20%20%20%20%20%20%20%20%20%20%20%20%20%20%20%3D%20%22%24%7Bvar.key_pair_id%7D%22%0A%20%20vpc_security_group_ids%20%3D%20%5B%22%24%7Bvar.security_group_id%7D%22%5D%0A%20%20subnet_id%20%20%20%20%20%20%20%20%20%20%20%20%20%20%3D%20%22%24%7Bvar.subnet_id%7D%22%0A%20%20%0A%20%20root_block_device%20%7B%0A%20%20%20%20%20%20volume_size%20%3D%20%22%24%7Bvar.disk_size%7D%22%0A%20%20%7D%0A%20%20%0A%20%20tags%20%7B%0A%20%20%20%20%20%20Name%20%3D%20%22%24%7Bformat(%22%25s%2502d%22%2C%20var.group_name%2C%20count.index%20%2B%201)%7D%22%20%23%20-%3E%20%22backend02%22%0A%20%20%20%20%20%20Group%20%3D%20%22%24%7Bvar.group_name%7D%22%0A%20%20%7D%0A%20%20%0A%20%20lifecycle%20%7B%0A%20%20%20%20create_before_destroy%20%3D%20true%0A%20%20%7D%0A%20%20%0A%20%20%23%20Provisioning%0A%20%20%0A%20%20connection%20%7B%0A%20%20%20%20user%20%3D%20%22ubuntu%22%0A%20%20%20%20private_key%20%3D%20%22%24%7Bfile(var.private_key_path)%7D%22%0A%20%20%7D%0A%0A%20%20provisioner%20%22remote-exec%22%20%7B%0A%20%20%20%20inline%20%3D%20%5B%0A%20%20%20%20%20%20%22sudo%20apt-get%20-y%20update%22%2C%0A%20%20%20%20%5D%0A%20%20%7D%0A%7D" message="instance/main.tf" highlight="" provider="manual"/]

[pastacode lang="bash" manual="%23%20Used%20for%20configuring%20ELBs.%0Aoutput%20%22instance_ids%22%20%7B%0A%20%20%20%20value%20%3D%20%5B%22%24%7Baws_instance.instance.*.id%7D%22%5D%0A%7D" message="instance/output.tf" highlight="" provider="manual"/]

In the variables file, we have a few things worth mentioning:

  • a default path to the private key of the public key – we'll need the private key for connecting via SSH and launching the provisioner,
  • we define a list of AMIs, or more specifically a map. Here, since we're only focusing on Amazon's EU Central 1 region, we've only defined an AMI for that region (It's Ubuntu 16.04 LTS). You need to go browse Amazon's AMI library if you use another region, or you want to use another operating system,
  • some defaults are defined, like the count of instances, disk size, etc. These can be overwritten when invoking the module,
  • some variables don't have defaults – weirdly, Terraform doesn't let you automatically inherit variables, which is why I've chosen to place the private key path here. Otherwise I'd have to pass the main Terraform variable to every module.

The output file allows the module to export some properties – you have to explicitly define outputs for everything you want to reference later. The only thing I have to reference is the actual instance IDs (for use in the ELBs), so that's the only output.

Using the Tags array, we can add some info to our instances. I'm using one of Terraforms built-in functions, format, to generate a friendly hostname based on the group name and a 1-indexed number. Also, the provisioner clause is a little bare. Instead, one would typically reference an Chef or Ansible playbook, or just run some commands to set up your environment and bootstrap your application.

Back in your main Terraform file, main.tf, you can now start referencing your AWS EC2 Instance module:

[pastacode lang="bash" manual="module%20%22backend_api%22%20%7B%0A%20%20%20%20source%20%20%20%20%20%20%20%20%20%20%20%20%20%20%20%20%20%3D%20%22.%2Finstance%22%0A%20%20%20%20subnet_id%20%20%20%20%20%20%20%20%20%20%20%20%20%20%3D%20%22%24%7Baws_subnet.private.id%7D%22%0A%20%20%20%20key_pair_id%20%20%20%20%20%20%20%20%20%20%20%20%3D%20%22%24%7Baws_key_pair.auth.id%7D%22%0A%20%20%20%20security_group_id%20%20%20%20%20%20%3D%20%22%24%7Baws_security_group.default.id%7D%22%0A%20%20%20%20%0A%20%20%20%20count%20%20%20%20%20%20%20%20%20%20%20%20%20%20%20%20%20%20%3D%202%0A%20%20%20%20group_name%20%20%20%20%20%20%20%20%20%20%20%20%20%3D%20%22api%22%0A%7D%0A%0Amodule%20%22backend_worker%22%20%7B%0A%20%20%20%20source%20%20%20%20%20%20%20%20%20%20%20%20%20%20%20%20%20%3D%20%22.%2Finstance%22%0A%20%20%20%20subnet_id%20%20%20%20%20%20%20%20%20%20%20%20%20%20%3D%20%22%24%7Baws_subnet.private.id%7D%22%0A%20%20%20%20key_pair_id%20%20%20%20%20%20%20%20%20%20%20%20%3D%20%22%24%7Baws_key_pair.auth.id%7D%22%0A%20%20%20%20security_group_id%20%20%20%20%20%20%3D%20%22%24%7Baws_security_group.default.id%7D%22%0A%20%20%20%20%0A%20%20%20%20count%20%20%20%20%20%20%20%20%20%20%20%20%20%20%20%20%20%20%3D%202%0A%20%20%20%20group_name%20%20%20%20%20%20%20%20%20%20%20%20%20%3D%20%22worker%22%0A%20%20%20%20instance_type%20%20%20%20%20%20%20%20%20%20%3D%20%22t2.medium%22%0A%7D%0A%0Amodule%20%22frontend%22%20%7B%0A%20%20%20%20source%20%20%20%20%20%20%20%20%20%20%20%20%20%20%20%20%20%3D%20%22.%2Finstance%22%0A%20%20%20%20subnet_id%20%20%20%20%20%20%20%20%20%20%20%20%20%20%3D%20%22%24%7Baws_subnet.private.id%7D%22%0A%20%20%20%20key_pair_id%20%20%20%20%20%20%20%20%20%20%20%20%3D%20%22%24%7Baws_key_pair.auth.id%7D%22%0A%20%20%20%20security_group_id%20%20%20%20%20%20%3D%20%22%24%7Baws_security_group.default.id%7D%22%0A%20%20%20%20%0A%20%20%20%20count%20%20%20%20%20%20%20%20%20%20%20%20%20%20%20%20%20%20%3D%202%0A%20%20%20%20group_name%20%20%20%20%20%20%20%20%20%20%20%20%20%3D%20%22frontend%22%0A%7D%0A%0Amodule%20%22db_mysql%22%20%7B%0A%20%20%20%20source%20%20%20%20%20%20%20%20%20%20%20%20%20%20%20%20%20%3D%20%22.%2Finstance%22%0A%20%20%20%20subnet_id%20%20%20%20%20%20%20%20%20%20%20%20%20%20%3D%20%22%24%7Baws_subnet.private.id%7D%22%0A%20%20%20%20key_pair_id%20%20%20%20%20%20%20%20%20%20%20%20%3D%20%22%24%7Baws_key_pair.auth.id%7D%22%0A%20%20%20%20security_group_id%20%20%20%20%20%20%3D%20%22%24%7Baws_security_group.default.id%7D%22%0A%20%20%20%20%0A%20%20%20%20count%20%20%20%20%20%20%20%20%20%20%20%20%20%20%20%20%20%20%3D%203%0A%20%20%20%20disk_size%20%20%20%20%20%20%20%20%20%20%20%20%20%20%3D%2030%0A%20%20%20%20group_name%20%20%20%20%20%20%20%20%20%20%20%20%20%3D%20%22mysql%22%0A%20%20%20%20instance_type%20%20%20%20%20%20%20%20%20%20%3D%20%22t2.medium%22%0A%7D" message="" highlight="" provider="manual"/]

Instead of resource, the modules are referenced using the module clause. All modules have to have a source reference, pertaining to the directory of where the module's main.tf file is located.

Again, since modules can't automatically inherit or reference parent resources, we'll have to explicitly pass the subnet, key pair and security groups to the module.

This example consists of 9 instances:

  • 2x backend,
  • 2x backend workers,
  • 2x frontend servers,
  • 3x MySQL servers.

Load balancers

To finish our terraform file, we add the remaining component: load balancers.

[pastacode lang="bash" manual="%23%20Public%20Backend%20ELB%0Aresource%20%22aws_elb%22%20%22backend%22%20%7B%0A%20%20name%20%3D%20%22elb-public-backend%22%0A%0A%20%20subnets%20%20%20%20%20%20%20%20%20%3D%20%5B%22%24%7Baws_subnet.public.id%7D%22%2C%20%22%24%7Baws_subnet.private.id%7D%22%5D%0A%20%20security_groups%20%3D%20%5B%22%24%7Baws_security_group.elb.id%7D%22%5D%0A%20%20instances%20%20%20%20%20%20%20%3D%20%5B%22%24%7Bmodule.backend_api.instance_ids%7D%22%5D%0A%0A%20%20listener%20%7B%0A%20%20%20%20instance_port%20%20%20%20%20%3D%2080%0A%20%20%20%20instance_protocol%20%3D%20%22http%22%0A%20%20%20%20lb_port%20%20%20%20%20%20%20%20%20%20%20%3D%2080%0A%20%20%20%20lb_protocol%20%20%20%20%20%20%20%3D%20%22http%22%0A%20%20%7D%0A%20%20%0A%20%20health_check%20%7B%0A%20%20%20%20healthy_threshold%20%20%20%3D%202%0A%20%20%20%20unhealthy_threshold%20%3D%202%0A%20%20%20%20timeout%20%20%20%20%20%20%20%20%20%20%20%20%20%3D%203%0A%20%20%20%20target%20%20%20%20%20%20%20%20%20%20%20%20%20%20%3D%20%22HTTP%3A80%2Fhealthcheck.php%22%0A%20%20%20%20interval%20%20%20%20%20%20%20%20%20%20%20%20%3D%2030%0A%20%20%7D%0A%7D%0A%0A%23%20Public%20Frontend%20ELB%0Aresource%20%22aws_elb%22%20%22frontend%22%20%7B%0A%20%20name%20%3D%20%22elb-public-frontend%22%0A%0A%20%20subnets%20%20%20%20%20%20%20%20%20%3D%20%5B%22%24%7Baws_subnet.public.id%7D%22%2C%20%22%24%7Baws_subnet.private.id%7D%22%5D%0A%20%20security_groups%20%3D%20%5B%22%24%7Baws_security_group.elb.id%7D%22%5D%0A%20%20instances%20%20%20%20%20%20%20%3D%20%5B%22%24%7Bmodule.frontend.instance_ids%7D%22%5D%0A%0A%20%20listener%20%7B%0A%20%20%20%20instance_port%20%20%20%20%20%3D%2080%0A%20%20%20%20instance_protocol%20%3D%20%22http%22%0A%20%20%20%20lb_port%20%20%20%20%20%20%20%20%20%20%20%3D%2080%0A%20%20%20%20lb_protocol%20%20%20%20%20%20%20%3D%20%22http%22%0A%20%20%7D%0A%20%20%0A%20%20health_check%20%7B%0A%20%20%20%20healthy_threshold%20%20%20%3D%202%0A%20%20%20%20unhealthy_threshold%20%3D%202%0A%20%20%20%20timeout%20%20%20%20%20%20%20%20%20%20%20%20%20%3D%203%0A%20%20%20%20target%20%20%20%20%20%20%20%20%20%20%20%20%20%20%3D%20%22HTTP%3A80%2Fhealthcheck.php%22%0A%20%20%20%20interval%20%20%20%20%20%20%20%20%20%20%20%20%3D%2030%0A%20%20%7D%0A%7D%0A%0A%23%20Private%20ELB%20for%20MySQL%20cluster%0Aresource%20%22aws_elb%22%20%22db_mysql%22%20%7B%0A%20%20name%20%3D%20%22elb-private-galera%22%0A%0A%20%20subnets%20%20%20%20%20%20%20%20%20%3D%20%5B%22%24%7Baws_subnet.private.id%7D%22%5D%0A%20%20security_groups%20%3D%20%5B%22%24%7Baws_security_group.default.id%7D%22%5D%0A%20%20instances%20%20%20%20%20%20%20%3D%20%5B%22%24%7Bmodule.db_mysql.instance_ids%7D%22%5D%0A%20%20internal%20%20%20%20%20%20%20%20%3D%20true%0A%0A%20%20listener%20%7B%0A%20%20%20%20instance_port%20%20%20%20%20%3D%203306%0A%20%20%20%20instance_protocol%20%3D%20%22tcp%22%0A%20%20%20%20lb_port%20%20%20%20%20%20%20%20%20%20%20%3D%203306%0A%20%20%20%20lb_protocol%20%20%20%20%20%20%20%3D%20%22tcp%22%0A%20%20%7D%0A%20%20%0A%20%20health_check%20%7B%0A%20%20%20%20healthy_threshold%20%20%20%3D%202%0A%20%20%20%20unhealthy_threshold%20%3D%202%0A%20%20%20%20timeout%20%20%20%20%20%20%20%20%20%20%20%20%20%3D%203%0A%20%20%20%20target%20%20%20%20%20%20%20%20%20%20%20%20%20%20%3D%20%22HTTP%3A9222%2F%22%20%23%20Galera%20Clustercheck%20listens%20on%20HTTP%2F9222%0A%20%20%20%20interval%20%20%20%20%20%20%20%20%20%20%20%20%3D%2030%0A%20%20%7D%0A%7D" message="" highlight="" provider="manual"/]

The load balancers provide the entrypoints for our application. One thing to note here is how the instances are referenced[Footnote 1].

Main output file

To put a cherry on top, we'll create an output file for our main project, output.tf. Again, due to the filename, Terraform will automatically pick it up.

[pastacode lang="bash" manual="%23%20Public%20Load%20Balancers%0A%0Aoutput%20%22api_address%22%20%7B%0A%20%20value%20%3D%20%22%24%7Baws_elb.backend.dns_name%7D%22%0A%7D%0A%0Aoutput%20%22frontend_address%22%20%7B%0A%20%20value%20%3D%20%22%24%7Baws_elb.frontend.dns_name%7D%22%0A%7D%0A%0A%23%20Private%20Load%20Balancers%0A%0Aoutput%20%22galera_address%22%20%7B%0A%20%20value%20%3D%20%22%24%7Baws_elb.db_mysql.dns_name%7D%22%0A%7D" message="output.tf" highlight="" provider="manual"/]

This will display the hostnames of our ELBs in a friendly format after running terraform apply, which is handy for copying into a configuration file or your browser.

You can now run terraform plan again like before, but since you're using modules, you'll have to run terraform get first to include them.

Then you can see that it will create the remaining infrastructure when you do terraform apply.

You can clone, fork or download the full project over on Github.

Next steps

Where can you go from here? I have a couple ideas:

  • Move your DNS to Amazon Route53 and automate your DNS entries with the outputs from the ELBs.
  • In addition to Route53, see what other AWS services you can provision using Terraform, like S3 buckets, autoscaling groups, AMIs, IAM groups/policies...
  • Further use modules to simplify your main file, for example by nesting multiple resources in one file. You could, for example, have all your network setup in a single module to make the base main.tf file more concise.
  • Integrate with provisioning software like Ansible, using their EC2 inventory to easily provision new instances.

Footnotes

  1. Yes, the instance IDs are inside a string, which is how all resources or modules are references, even though they technically are arrays and (in my opinion) shouldn't be encapsulated in a string. But that's how it is.
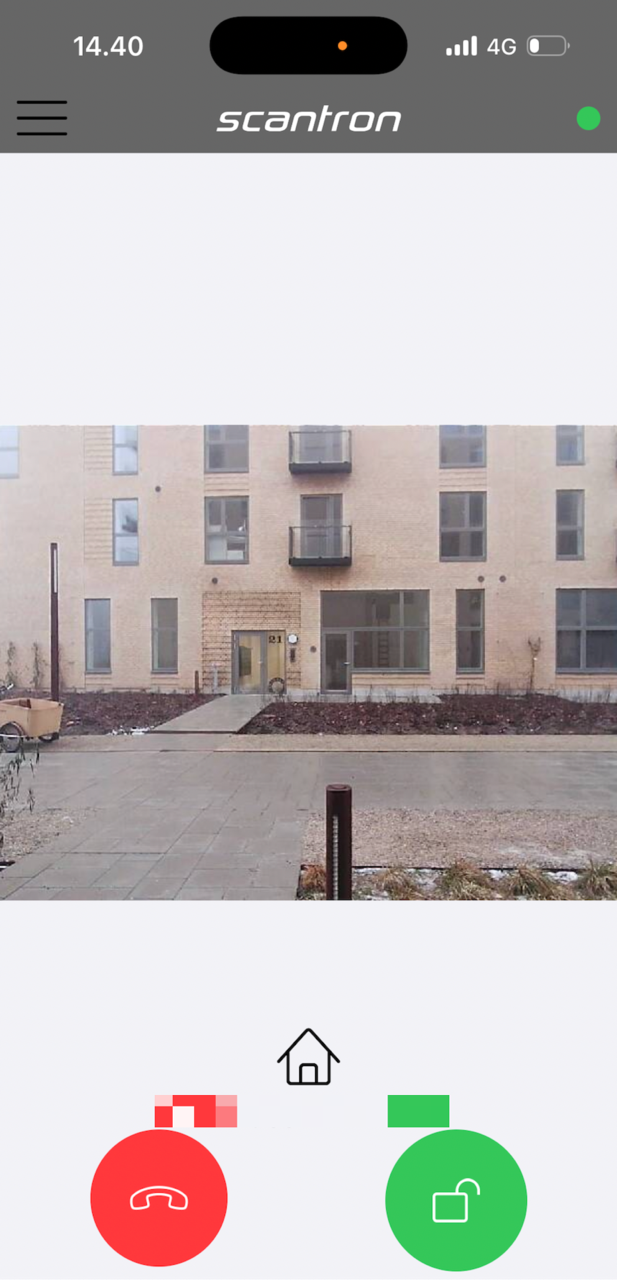
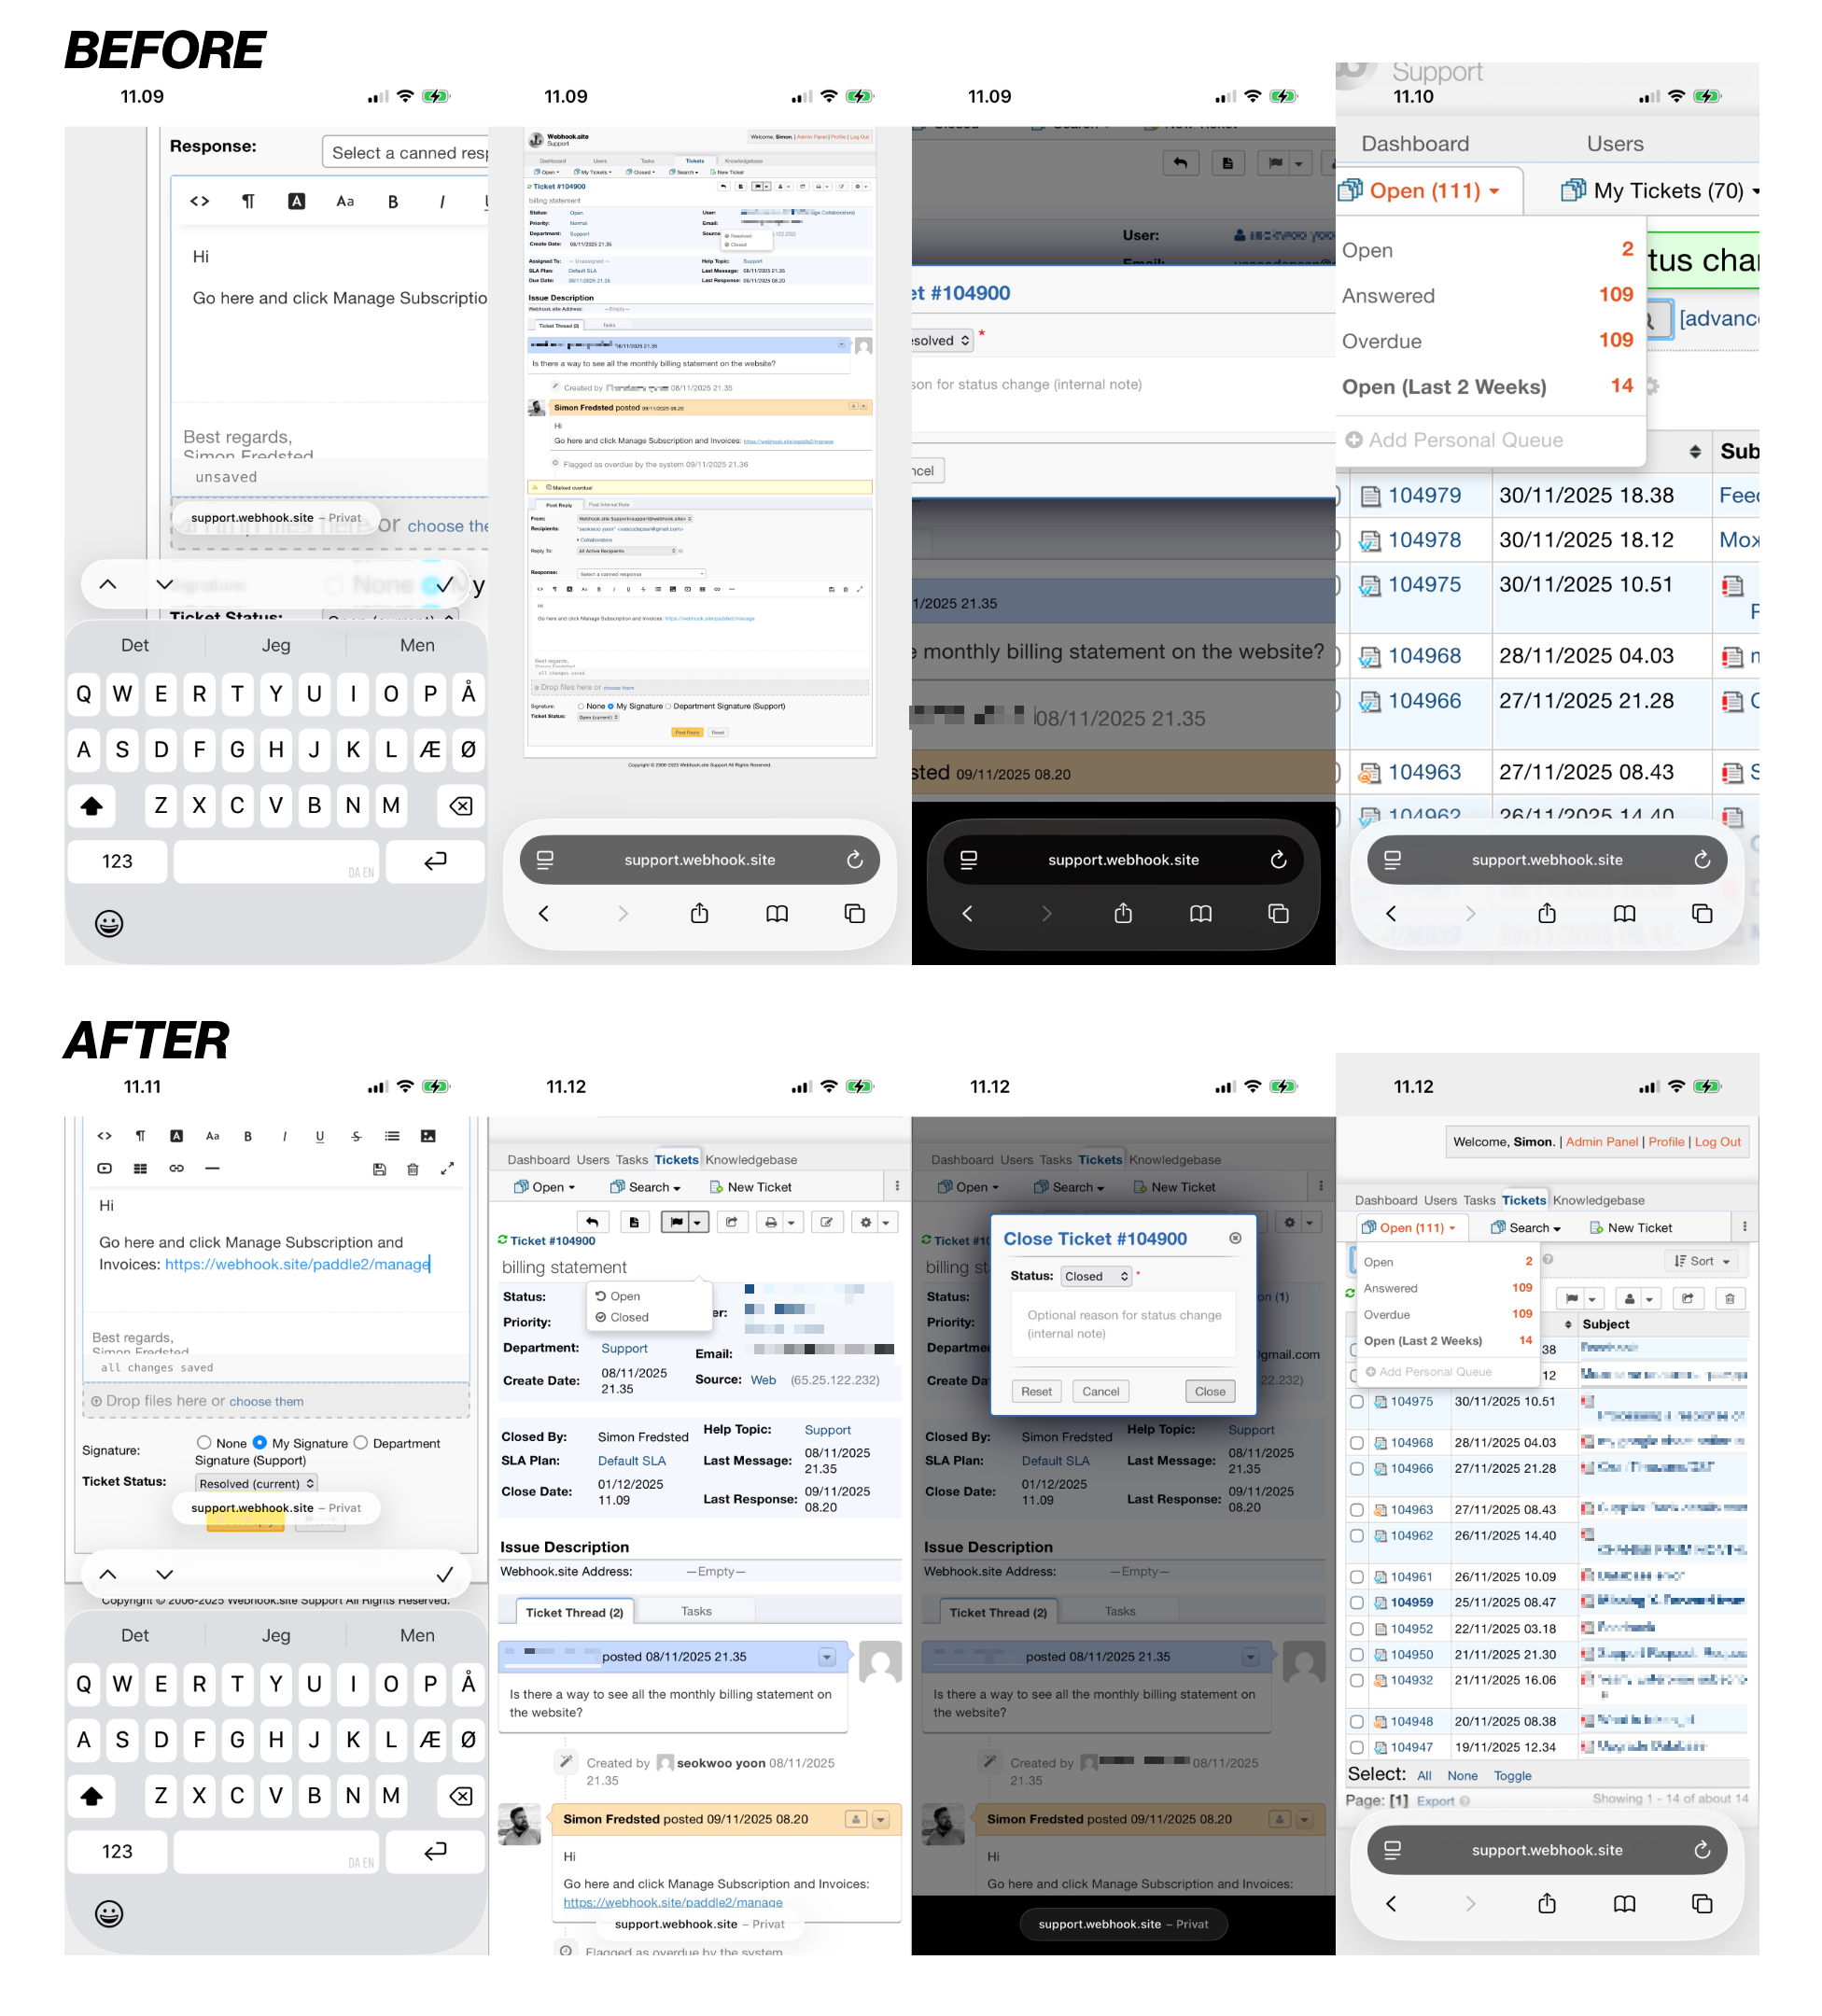
Apr 13 23 How to use Apple’s SF Mono font in your editor

At WWDC 2016, Apple unveiled a brand new font which was called San Francisco. The font went on to become the default font in macOS and iOS, replacing Helvetica (which replaced Lucida Sans). On watchOS, a special Compact variant of San Francisco, was used.

Later, Apple introduced yet another variant, a monospaced variant, which I think simply looks fantastic – especially on a high-resolution display like the MacBook. It has gone and replaced my previous favourite monospace font, Anonymous Pro.

Weirdly enough, the fonts are not available for selection in macOS, you just can't use San Francisco for editing a document in Pages, for example.

Currently, though, the standard and Compact versions of San Francisco is available on Apple's developer portal, but unfortunately the monospaced version is not.

Fortunately, if you have macOS Sierra, the version is included inside the Terminal.app in macOS.

Here's how you extract the font from Terminal.app and install it on your computer so you can use it in your text editor, for example:

  1. Go to Terminal.app's resources folder:
    1. Right click the Finder icon in the Dock
    2. Click 'Go to Folder...'
    3. Enter this path: /Applications/Utilities/Terminal.app/Contents/Resources/Fonts
    4. Click Go
  2. You'll see a list of fonts in the folder.
    1. Select all of the fonts in the folder.
    2. Right click on them and click 'Open'
  3. A window will pop-up previewing the font. Click Install Font.
  4. You'll perhaps get a window that says there's problems with the fonts. I did too.
    1. Go ahead and click 'Select all fonts'
    2. Click 'Install Checked'
    3. You'll get another dialog
    4. Click 'Install'
  5. Font Book will show the new font as installed. You'll now be able to select the SF Mono font in your editor. ?

Here's a GIF of the whole process:

Jan 31 2 Back up Elasticsearch with S3 compatible providers

ElasticSearch is a popular search engine and database that's being used in applications where search and analytics is important. It's been used as a primary database in such applications as HipChat, storing billions of messages while making them searchable.

While being very feature-complete for use cases like that, being new (compared to other popular datastores like MySQL), ElasticSearch also has a disadvantage when being used as a permanent datastore: backups.

In the early days of ElasticSearch, backup was crude. You shut down your node, or flushed its contents to disk, and did a copy of the data storage directory on the harddrive. Copying a data directory, isn't very convenient for high-uptime applications, however.

In later versions, ES introduces snapshots which will let you do a complete copy of an index. As of version 2, there's several different snapshot repository plugins available:

  • HDFS
  • Amazon S3
  • Azure
  • File system/Directory

File System

For the file system repository type, ElasticSearch requires that the same directory is being mounted on all nodes in the cluster. This starts getting inconvenient fast as your ES cluster grows.

The mount type could be NFS, CIFS, SSHFS or similar. To make sure the file mount is always available, you can use a program like AutoFS to make sure.

On clusters with a few nodes, I haven't had good luck with it – even using AutoFS, the connection can be unstable and lead to errors from ElasticSearch, and I've also experienced nodes crashing when the repository mount came offline.

S3/Azure

Then there's S3 and Azure. They work great – provided that there isn't anything preventing you from storing your data with a 3rd party, American-owned cloud provider. It's plug and play.

S3 Compatible

If you for some reason can't use S3, there's other providers that provide storage cloud services that are compatible with the S3 API.

If you prefer an on-prem solution, you can use storage engine that support it. Minio is a server written in Go that's very easy to get started with. More complex tools include Riak S2 and Ceph.

Creating an S3 compatible repository is the same as creating an Amazon S3 repository. You need to install the cloud-aws plugin in ES, and in the elasticsearch.yml config file, you need to add the following line:

cloud.aws.signer: S3SignerType

Not adding this line will result in errors like these:

com.amazonaws.services.s3.model.AmazonS3Exception: 
null (Service: Amazon S3; Status Code: 400; Error Code: InvalidArgument; Request ID: null)

and

The request signature we calculated does not match the signature you provided

Per default, it's AWSS3SignerType, and that prevents you from using an S3 compatible storage repository.

Setting the repository up in ES is similar to the AWS type, except you also specify an endpoint. For example, with the provider Dunkel.de, you'd add a repository like this:

POST http://es-node:9200/_snapshot/backups
{
  "type": "s3",
  "settings": {
    "bucket": "backups",
    "base_path": "/snapshots",
    "endpoint": "s3-compatible.example.com",
    "protocol": "https",
    "access_key": "Ze5Zepu0Cofax8",
    "secret_key": "Qepi7Pe0Foj2RuNat2Fox8Zos7YuNat2Fox8Zos7Yu"
  }
}

To learn more about the snapshot endpoints, here's a link to the ES documentation.

If you take a lot of different backups, I'd also recommend to take a look at the kopf ES plugin, which has a nice web interface for creating, restoring and otherwise administering snapshots.

Periodical snapshots

I've had success setting up snapshots using cronjobs. Here's an example on how to automatically do snapshots.

On one of the ES nodes, simply add a cronjob which fires a simple request to ES, like this, which creates a snapshot with the current date:

0,30 * * * * curl -XPUT 'http://127.0.0.1:9200/_snapshot/backups/'$(date +\%d-\%m-\%Y-\%H-\%M-\%S)''

This will create a snapshot in the backups repository with a name like "20-12-2016-11-30-00" – the current date and time. You can also use a similar command to create a new ES repository every month, for example, so you can periodically take a complete snapshot of the cluster.

If you want a little more control, Elastic provides a nice tool called Curator which lets you easily organise repositories, snapshots, deleting old indexes, and more. Instead of doing a curl request in a cronjob, you write a Curator script which you can run in a cronjob – it gives you more flexibility.

Concurrency errors with snapshots

This section isn't S3 specific, but I've run into these issues so often that I thought I'd write a little about them.

ElasticSearch can be extremely finicky when there's network timeouts while doing snapshots, for example, and you won't get any help from the official ES documentation.

For example, you may experience that a snapshot is stuck. It's IN_PROGRESS, but it never finishes. You can then do a DELETE <repository_name>/<snapshot_name>, and it will be of status ABORTED. Then you might experience you're stuck. It will stay at ABORTED forever, and when trying to DELETE it again, you'll get this:

{
 "error": {
 "root_cause": [
   {
     "type": "concurrent_snapshot_execution_exception",
     "reason": "[<repository_name>:<snapshot_name>] another snapshot is currently running cannot delete"
   }
 ],
 "type": "concurrent_snapshot_execution_exception",
 "reason": "[<repository_name>:<snapshot_name>] another snapshot is currently running cannot delete"
 },
 "status": 503
}

Now, trying to create another snapshot gets you this:

{
 "error": {
 "root_cause": [
   {
     "type": "concurrent_snapshot_execution_exception",
     "reason": "[<repository_name>:<snapshot_name>] a snapshot is already running"
   }
 ],
 "type": "concurrent_snapshot_execution_exception",
 "reason": "[<repository_name>:<snapshot_name>] a snapshot is already running"
 },
 "status": 503
}

The only way to fix this is to do either a rolling upgrade (e.g. restart one node, then the next), or a complete restart of the whole cluster. That's it.

Jan 15 1 Simple Mac window management with BetterTouchTool

As a software developer, I not only work with lots of different windows on my computer screen, but with lots of different sets of windows. Not only am I dependent on windows being in different places, but in different sizes. As such, I need to manage all these windows in some way.

For example, I often need to have 3 browser windows open. Maybe one for documentation, one for a project management tool and one for testing. And then I'd of course want a text editor. Maybe for a while I'd like one of the windows to take up more space, so I move one to a different screen and make the other window larger.

It would take me a while to manually drag these windows to their right places.

Luckily, a program for Mac called BetterTouchTool allows me to easily define sets of hotkeys that carries out all this moving and sizing of windows. I find that it speeds up my workflow a lot – I can easily organise my desktop.

It's even preferable to the Windows 7-style drag-to-maximize Snap feature since I don't have to use my mouse at all.

Here's the shortcuts I've defined:

Use the link below to download a BTT preset of these shortcuts.

Did you create any cool sets of shortcuts or workflow improvements with BetterTouchTool you want to share? Let us know in the comments.

Sep 27 3 How to extend a LVM volume group

Extending a logical volume group usually needs to be done when the size of a VMware disk has been increased for a Linux VM. When resizing a disk, the volume isn't extended automatically, so you need to extend the logical volume in the VM's volume group.

This article assumes that:

  • You have a LVM volume group with a logical volume
  • You've added free space in the virtualizer, e.g. VMware
  • You're running Ubuntu. Might also work with other distributions
  • You have basic knowledge of partitions and Linux

Creating new partition with Gparted

  1. Start by creating a new partition from the free space. I prefer doing this with a GUI using gparted. You need XQuartz if you're on a Mac.
    1. SSH into the box with -X, e.g. ssh -X myserver
    2. Install gparted: apt-get install -y gparted and run gparted
    3. Find the unallocated space ("unallocated" file system)
    4. Right click and click New.
    5. Create as "primary partition" and Choose lvm2 pv  as the "file system"
    6. Click Add
    7. Click Apply in the toolbar and again in the dialog
    8. Note the disk name in the Partition column, e.g. /dev/sda3
  2. You should see the disk with fdisk -l
  3. Run pvcreate <disk>, e.g. pvcreate /dev/sda3
  4. Find the volume group: run vgdisplay (name is where it says VG Name)
  5. Extend the VG with the disk: vgextend <vg name> <disk>, e.g. vgextend VolumeGroup /dev/sda3
  6. Run vgscanpvscan
  7. Run lvdisplay to find the LV Path, e.g. /dev/VolumeGroup/root
  8. Extend the logical volume: lvextend <lv path> <disk>, e.g. lvextend /dev/VolumeGroup/root /dev/sda3
  9. Resize the file system: resize2fs <lv path>, e.g. resize2fs /dev/VolumeGroup/root
  10. Finally, verify that the size of the partition has been increased with df -h

Aug 30 0 Office Dashboards with Raspberry Pi

If you're in need of a simple computer to drive an infoscreen, which usually just consists of showing a website in fullscreen, Raspberry Pi computers are a great choice. They're cheap, newer versions have WiFi and HDMI output, and they're small – so they're easy to mount on the back of a TV.

Even better, most never TVs have a USB port nowadays, so for a power source, just plug your Pi in to the TV.

Sample dashboard

One problem, however, is that it gets increasingly hard to control the infoscreens the more you add. For example, if you have 6, you don't want to have to manage them independently, and you want to be able to change the setup quickly.

At the office, we've set up 6 Samsung TVs, each with their own Pi. On each is a different dashboard:

What I ended up with is a simple provisioning script that configures the Pi:

Quite a bit is happening here – in order:

  1. WiFi power management is disabled. I've found that it makes WiFi very unstable on the Pis.
  2. We need to set the hostname; every pi needs a unique one. We'll see why later.
  3. The desktop wallpaper is changed. You can remove this part if you like raspberries!
  4. Chromium is installed. I tried Midori, and others. Chromium just works.
  5. We setup a script that starts when the desktop session loads, startup.sh. This will run Chromium.
  6. Then we reboot to apply the hostname change.

In the script, there's two things you must modify: URLs to the desktop wallpaper and the directory to the dashboard files.

So what's the dashboard files?

The way it works is this: if the hostname of the Pi is raspberry-pi-1 and you set dashboard_files_url to https://mycorp.com/files/dashboard/, the Pi will go to https://mycorp.com/files/dashboard/raspberry-pi-1.html – that way, if you want to change the URL of one of your screens, you just have to change a file on your Web server.

While you could do more about it and make a script on your server, I just went with simple html files with a meta-refresh redirect.

I feel that it's easier to manage this stuff from a central place rather than SSHing into several different machines.

Do you have a better way of managing your dashboards? Do you have a cool dashboard you've designed? Tell us in the comments!

Update regarding Chromium and disable-session-crashed-bubble switch

Newer updates of Chromium removed support for the --disable-session-crashed-bubble that disabled the "Restore pages?" pop-up.

This is annoying since we cut off power to the Raspberry Pi's to shut them down, and a power cut triggers the popup.

Even more annoying, alternative browsers on the Raspberry Pi like Midori or kweb can't run the newest Kibana – a dashboard used for monitoring – at all, so I had to find a workaround for this.

The alternative I found was that you can use the --incognito switch, which will prevent the popup, but then you can't use dashboard that require a cookie to be present (ie. because of login), like Zabbix or Jenkins.

If --incognito won't do, the solution I found so far was to use xte to simulate a click on the X button of the dialog. It's stupid, I know, but since the Chromium developers don't think anyone is using that feature, there you go.

Note that you might want to change the mouse coordinates to where the X button is.

#!/bin/sh

# Close that fucking session crashed bubble
sleep 60
xte "mousemove 1809 20" -x:0
sleep 1
xte "mouseclick 1" -x:0

If you have a better solution, don't hesitate to write in the comments!

Nov 27 0 Strikethroughs in the Safari Web Inspector styles? Here’s why

Safari uses a strikethrough in showing invalid properties in style sheets. This is not documented, and there's no tooltips to explain this multicolored line.

There are 2 known different strikethroughs, red and black.

Styles getting overridden by other styles are striked out in black:

Strike (overridden)


But when it's an invalid or supported property, or the value can't be parsed, the strikethrough in the style sidebar is red:

co6uu


Nov 18 20 300,000 login attempts and 5 observations

About a year ago, I developed a WordPress extension called WP Login Attempt Log. All it does is log every incorrect login attempt to your WordPress page and display some graphics and a way to search the logs. It logs the username, the password, the IP address and also the user agent, e.g. the browser version.

Observation number 1: attacks come and go


181114x5krq

Screenshot of login attempts from the past 2 weeks, from the plugin

One thing that is striking about this graph is how much the number of attacks differ per day. Some day I will get tens of thousands of attempts, on other days I will get under 100. On average, though, I get about 2200 attempts per day, 15,000 per week and 60,000 per month. It suggests that my site is part of a rotation, or maybe that someone really wants to hack my blog on mondays.

Observation number 2: passwords are tried multiple times

All in all, there's about 36,000 unique passwords that have been used to brute-force my WordPress blog. From the total number of around 360,000 attacks, each password must is used on average of 10 times. But of course, some are used more than others, as you can see in the table below.

What's interesting is that there's not a larger amount of different passwords. From the large password database leaks the past few years – we're talking tens of millions – one could expect the amount of different passwords more closely matching the number of total attempts.

Of course, there might also just be 10 different people out to hack my blog, and they all have the same password list. :-)

Observation number 3: the most common password is "admin"

An empty password was tried around 5,300 times. Here's a list of the most used passwords, along with how many times they were used:

Attempts Password
5314 (blank)
523 admin
284 password
269 123456
233 admin123
230 12345
215 123123
213 12345678
207 1234
205 admin1
203 internet
202 pass
201 qwerty
198 mercedes
194 abc123
191 123456789
191 111111
191 password1
190 freedom
190 eminem
190 cheese
187 test
187 1234567
186 sandra
184 123
182 metallica
181 simonfredsted
180 friends
179 jeremy
178 1qaz2wsx
176 administrator

This is not a list of recommended passwords. :-) Definitely don't use any of those.

Observation number 4: 100 IP addresses account for 83% of the attempts

The top 1 IP address that have tried hacking my blog, 54.215.171.123, originates from a location you wouldn't suspect: Amazon. That IP has tried to attack my blog a whopping 45,000 times, 4 times that of the second IP on the list.

I took the top 25 offenders and did a WHOIS on them. I guess if you're looking for a server company to do your WordPress hacking, here you go:

Attempts IP Address ISP Country Code
45465 54.215.171.123 Amazon Technologies US
15287 63.237.52.153 CenturyLink US
10842 123.30.212.140 VDC VN
10425 185.4.31.190 Green Web Samaneh Novin Co IR
10423 95.0.223.134 Turk Telekom TR
10048 46.32.252.123 Webfusion Internet Solutions GB
10040 94.23.203.18 OVH SAS FR
10040 46.4.38.83 Hetzner Online AG DE
10040 108.168.129.26 iub.net US
10040 193.219.50.2 Kaunas University of Technology LT
10036 84.95.255.154 012 Smile Communications IL
10035 80.91.189.22 Private Joint Stock Company datagroup UA
10030 94.230.240.23 Joint Stock Company TYVASVIAZINFORM RU
10030 123.30.187.149 VDC VN
10029 89.207.106.19 Amt Services srl IT
9328 67.222.98.36 IHNetworks, LLC US
9327 85.95.237.218 Inetmar internet Hizmetleri San. Tic. Ltd. Sti TR
9327 62.75.238.104 PlusServer AG DE
9326 5.39.8.195 OVH SAS FR
9326 5.135.206.157 OVH SAS FR
9208 211.25.228.71 TIME dotCom Berhad MY
9168 176.31.115.184 OVH SAS FR
8804 78.137.113.44 UKfastnet Ltd GB
8201 134.255.230.21 INTERWERK - Rotorfly Europa GmbH & Co. KG DE
7598 5.199.192.70 K Telecom RU
6952 85.195.91.10 velia.net INternetdienste GmbH DE
5231 67.222.10.33 PrivateSystems Networks US
3546 5.248.87.146 Kyivstar PJSC UA
3202 78.46.11.250 Hetzner Online AG DE
2099 93.45.151.167 Fastweb IT
1940 92.222.16.54 OVH SAS FR

Another interesting thing about this is is the amount of IPs hovering at around 10,000 attempts. It seems like there's a limit where the attacker gave up, moved on to the next target. Maybe all these are a part of a single botnet, and each machine in it is only allowed to attack 10,000 times. Who knows.

Observation number 5: protect yourself by using an unique username

WordPress hackers are really sure that you'll use a pretty standard username, or at least something to do with the name of your blog. A total of just 165 different usernames were tried, compared to the tens of thousands of passwords.

Therefore my final takeaway is to choose an obscure username as well as an obscure password. There's only 11 usernames that have been used more than a hundred times. This was kind of surprising to me.

Attempts Username
164360 admin
119043 simon
15983 administrator
10787 test
10429 adm
10416 user
9871 user2
9253 tester
8147 support
1818 simonfredsted
189 simo
57 root
57 login
56 admin1
3 qwerty
3 [email protected]
3 simonfredsted.com
2 aaa

That's a lotta attacks, what do I have to fear?

WordPress blogs is one of the most targeted platforms for hackers, many sites use it, from big news organisations to small blogs like this one. If someone can get a login and start fiddling with your links, they can boost traffic to their own viagra peddling sites.

But, as long as you keep your software updated (WordPress makes this very, very easy) and keep the following two rules in mind, you're totally safe.

Bottom line: Set a lengthy password consisting of random characters, letters and digits, and use a username that's not a part of your name, site URL or "admin". Maybe just use some random letters, your password manager will remember it after all.

If you do those two things, there's nothing to worry about.


If you have your own take on this data, or think I've misinterpreted something, feel free to leave a comment below or on Hacker News – I'd love to hear your thoughts.